PlutoBoard
21 May 2020
Nicole Lin (nl392) and Joseph Benjamin (jkb237)
Introduction
PlutoBoard is a model prototype of a climbing wall route-management system, which consists of an array of LED and button pairs corresponding to climbing holds and a touchscreen UI. Typically, climbers use tape, chalk, or their memory to remember which holds are included in each climbing route, but on the PlutoBoard, the buttons and LEDs are used in tandem to set routes: LEDs are used to indicate whether a specific hold is included, buttons are used to toggles the on-state of its corresponding LED. By interacting with the UI, climbers can create user profiles, save and grade routes, generate routes with randomized pattern by difficulty, and access/edit routes later.

Project Objective:
- Create an interative route setting system for a climbing wall
- Make an intuitive UI to easily organize, edit, and save routes
- Support multiple user profiles
- Perform these objectives using only the limited GPIO available on the RPi 3B
Design
PlutoBoard’s electrical design was largely driven by the limited number of GPIO pins available on the RPi Model 3B. We decided to use the piTFT as our user interface, after being introduced to its use in prior class labs. The piTFT uses 8 pins for display control, and 4 pins for playback buttons. We could feasibly re-use the 4 playback button pins for our own use, giving us a total of 15 pins to use, leaving 1 playback button pin for use as a “bailout” if our touchscreen stopped working. Early on we decided to make our prototype model 1.5 ft by 1 ft, with a 2” grid, which gives a wall that can support 8 x 5 holds. This means we have 40 buttons and 40 LEDs to control. After researching matrix multiplexing and charlieplexing methods, we determined that using dedicated hardware IC’s would be easier and faster. Every GPIO pin connected to the RPi has a current limiting resistor in series with it to prevent overcurrent damage to the RPi.
Rev1 Electrical Design
When we were first designing the electrical system, we included 2 GPIO pins to power servos for another feature we wanted to add to PlutoBoard: incline control. This left us with 13 GPIO pins to work with.
Our first revision of the hardware used 6 8:1 multiplexers (MUX), in a hierarchical format, to read button presses. 5 of the MUX’s would be used to read the 40 buttons (8 each), with the 6th MUX used to choose which of the 5 MUX’s data to send to the Pi. This configuration requires 7 GPIO pins: 3 pins for the select signals for MUX level 1, 3 pins for the select signals for MUX level 2, and 1 pin to read button data from.
Accounting for the 7 pins needed to control buttons, we were left with 6 pins to control the LEDs; if we wanted to charlieplex the LEDs, we would need 7 GPIO pins, so we had to find an alternative method. After some research, we decided to try using shift registers, which use a constant number of pins to control many outputs. In our design, the LED outputs use 5 8-bit shift registers, with each output connected to the input of an npn Darlington transistor array to amplify the current powering the LEDs. We initially included this power relay in our schematic because the vendor we got the LEDs from on Amazon reported that each LED required 20mA of current, and the maximum continuous current output of the shift registers is only 35mA. This configuration requires 5 GPIO pins: all 5 are signals to control the shift registers.
The first revision of our electrical design uses 12 GPIO pins, leaving us with 1 available pin.
Rev2 Electrical Design
At this point we had decided to scrap the incline control because we did not have sufficient means to make a robust mechanical system in quarantine. This freed two GPIO pins, giving us 15 total pins to use. Because we were now able to use more pins, we revisited and refined the electrical design.
The hierarchical MUX design became a flat design with just 5 MUX’s, with each MUX output going directly to the Pi. This configuration requires 8 GPIO pins: 3 pins for the MUX select signals, and 5 pins to read button data from.
Additionally, we now had enough pins to consider charlieplexing, but decided that the shift registers would still be a superior method because we anticipated that the board would not require many changes to the LED matrix very frequently. In this scenario, the shift registers are a better solution because we would not need to continuously vary the control signals in order to power the LEDs for long periods of time. In charlieplexing, in order to make it seem like all the LEDs are on at once, different source/sink GPIO pairs need to be turned on, and the entire matrix would require constant cycling. With the shift registers, the output latches and the control signals only need to change on a periodic refresh or when a button press is detected and toggles an LED’s state.
Using empirical testing after we received the LEDs, we also determined that the LEDs could be turned out with much less current than advertised on Amazon. We used 1k current limiting resistors to keep the shift register output current below the maximum 35mA specified in the shift register data sheet, and directly powered the LEDs off the shift registers. This removes the npn transistor arrays from the schematic.
This was the final hardware design we used for PlutoBoard, which uses a total of 13 GPIO pins.
Mechanical Design
As mentioned in the electrical design portion, we initially wanted to include incline control as part of our project, but determined that we could not feasibly make a robust and elegant system with the tools we had after losing access to our lab spaces on campus. The plan was to build a plywood wall on rails, which turned out to be a challenge because of the incompatible arc and linear geometries of a pivoting system and the rails. We designed some parts to make this work but decided that we could not make them without access to the machine shop we would normally use. Instead, we decided to focus on adding complexity to the UI and making sure the electrical hardware works. Our final wall is made of cardboard (the only stiff-ish material we could find in our apartments), with LEDs and buttons panel mounted to the front, and wires and perfboards in the back.
Software Design
Our code is well-commented, so reading the code is a good way of discovering how we designed the software. There were not many design steps to coding PlutoBoard; most were considered with fixing syntax errors and figuring out how to make all of the software work together in tandem (this will be covered more in the Testing section).
We use the Pi’s file system to manage user profiles and their corresponding routes. Our root directory is /home/pi. Each user profile is saved as a directory, and route information is stored in .txt files in the corresponding user’s directory. There are also two route files in the root directory, which are used to represent the status of LEDs on the current board (current_board.txt), and a blank board (blank_board.txt), which is used to turn off all the LEDs on the board. The current board route file is a temporary route file that is updated whenever buttons are pressed on the board and is saved to a permanent route file by the UI.
The UI itself is a ton of code using the PyGame library to visualize our menus, and hook into the file system. Depending on what on-screen buttons the user presses, the route files are manipulated in different ways and created in the correct user directory. Because the UI code is so long, we decided that it would be best to create a two-file system, with GPIO code separated into a different python script. This code polls the buttons and detects button presses (making sure not to mistake them for multiple presses using some debouncing logic), and changes the corresponding LED signal, which is maintained by an internal array. When a button has been pressed, the current board route file is changed to match the updated internal array. To display the correct LEDs, this internal LED array is used to manipulate the data signal going into the shift registers. Additionally, the shift register data is periodically refreshed to match what the current route file contains; this is because even if no button is pressed, a different route may have been loaded in by the UI.
Gallery
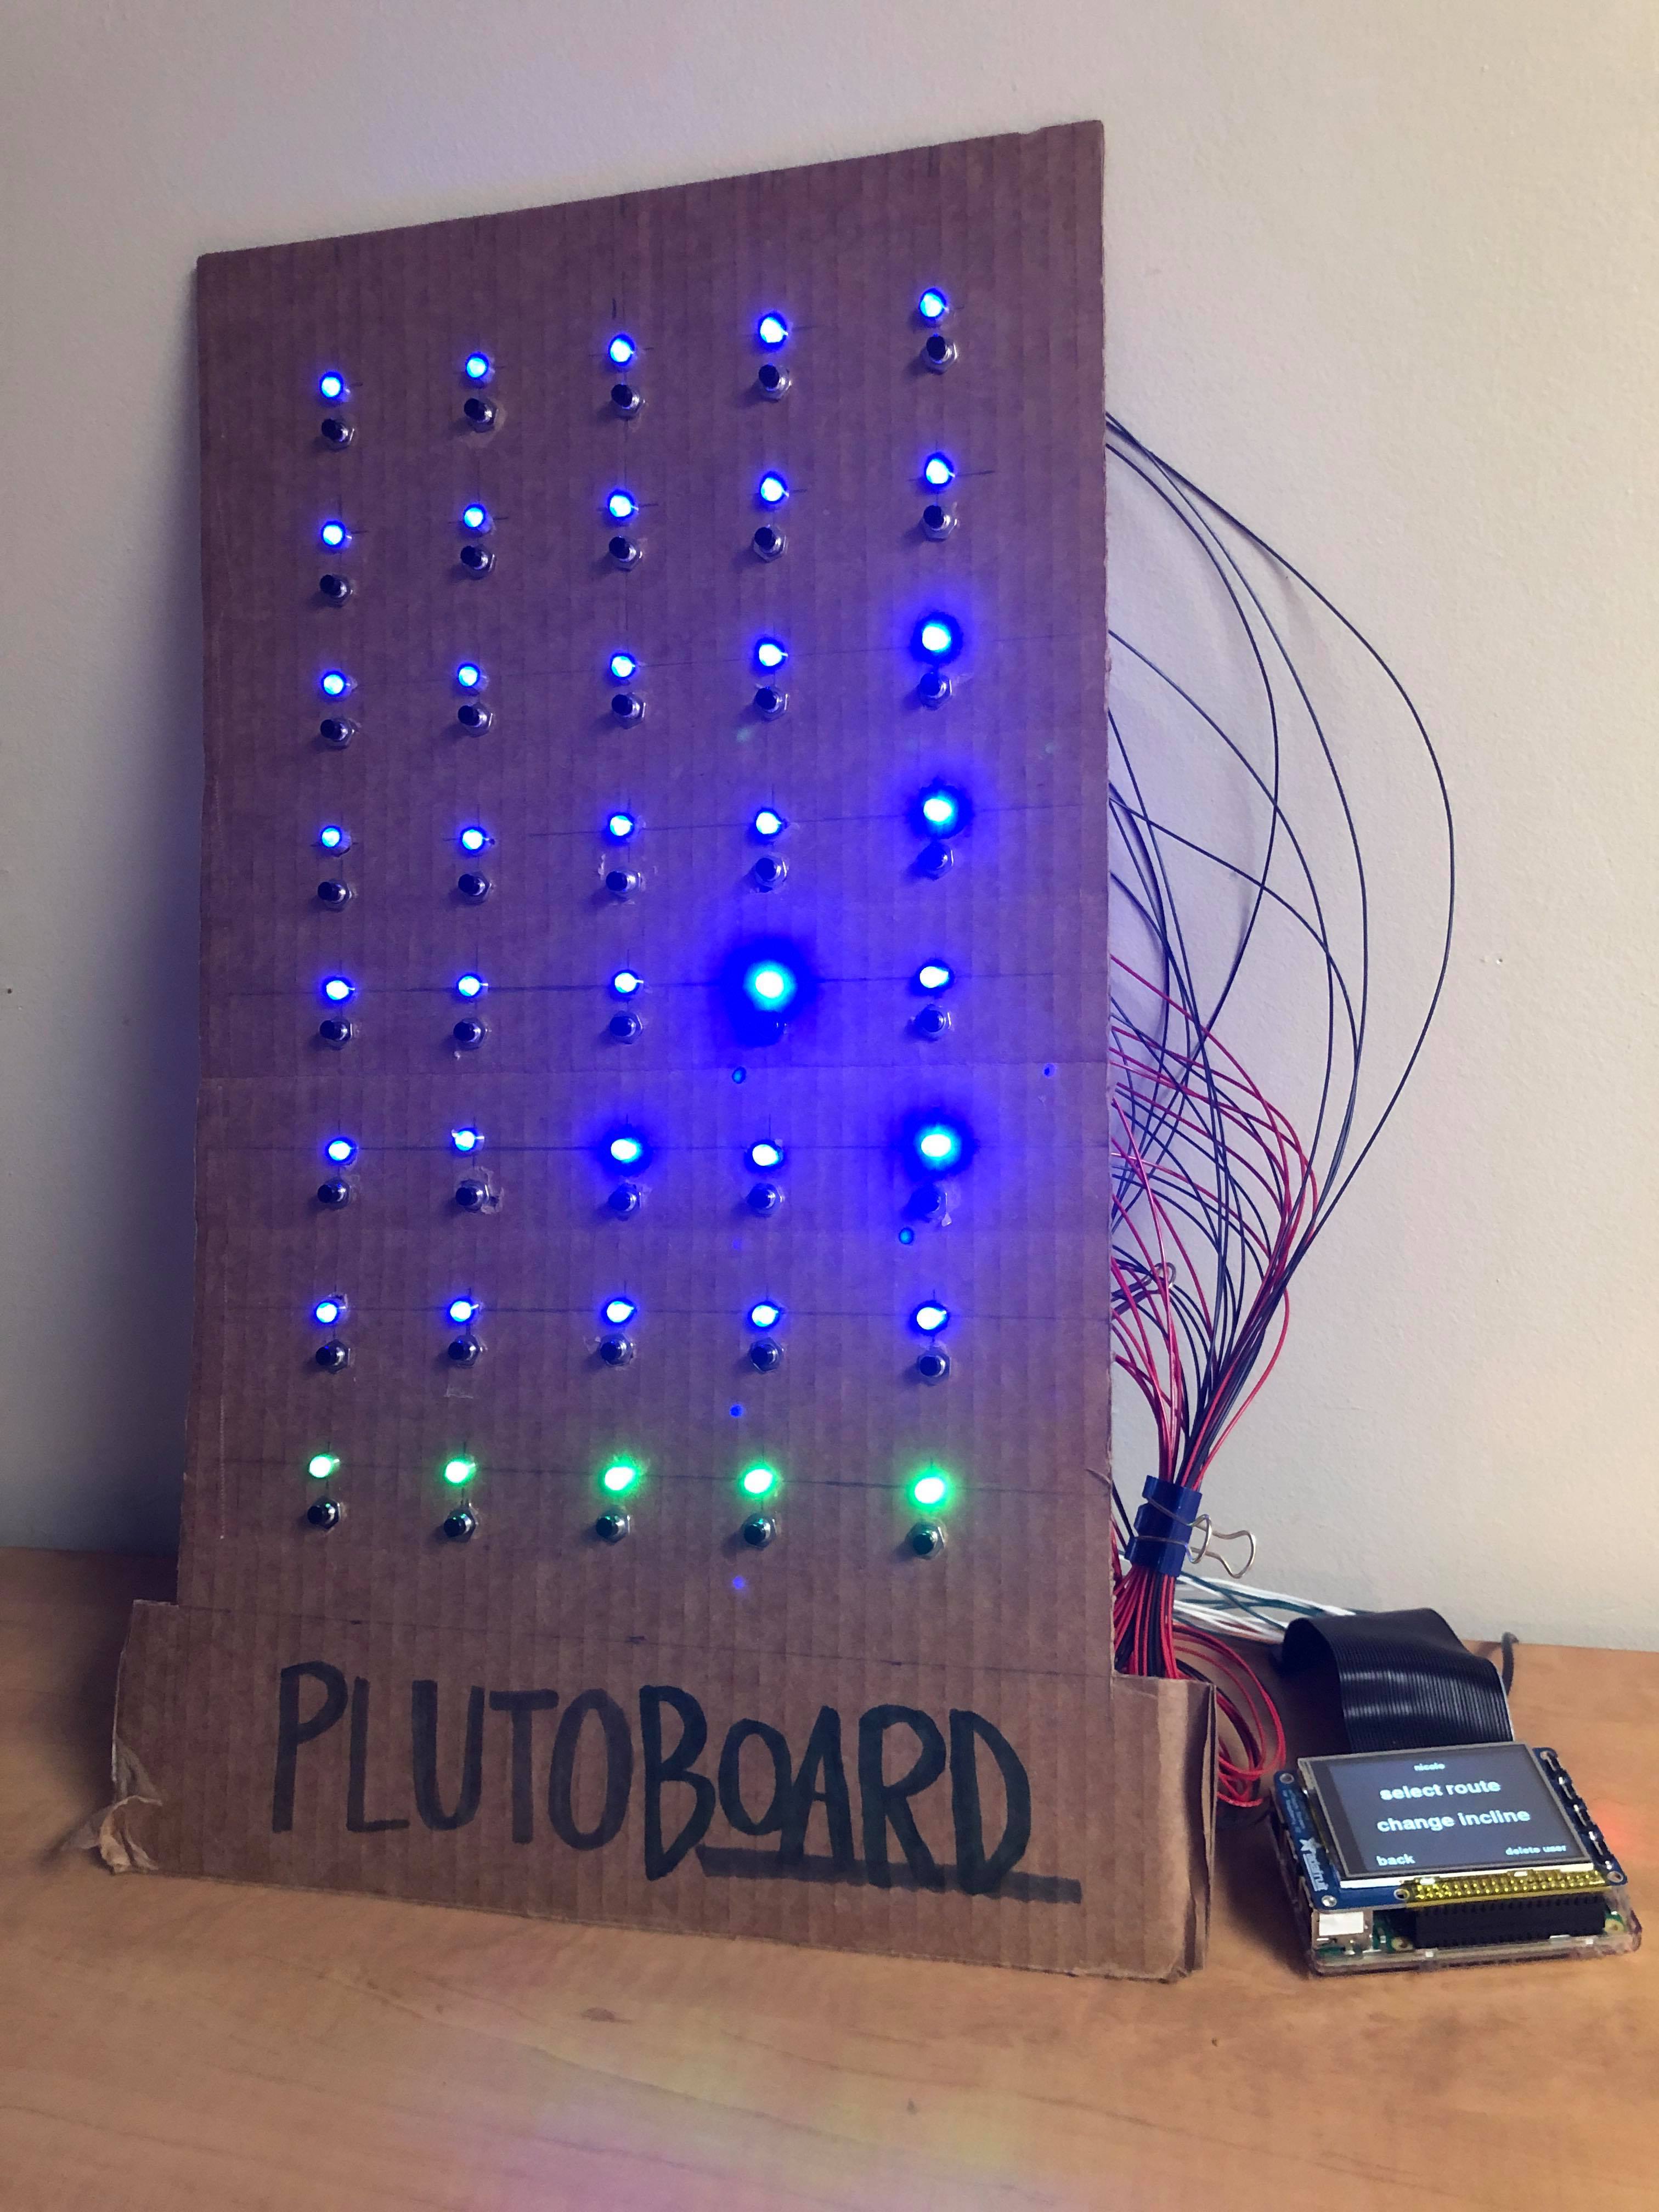 Everything lit up.
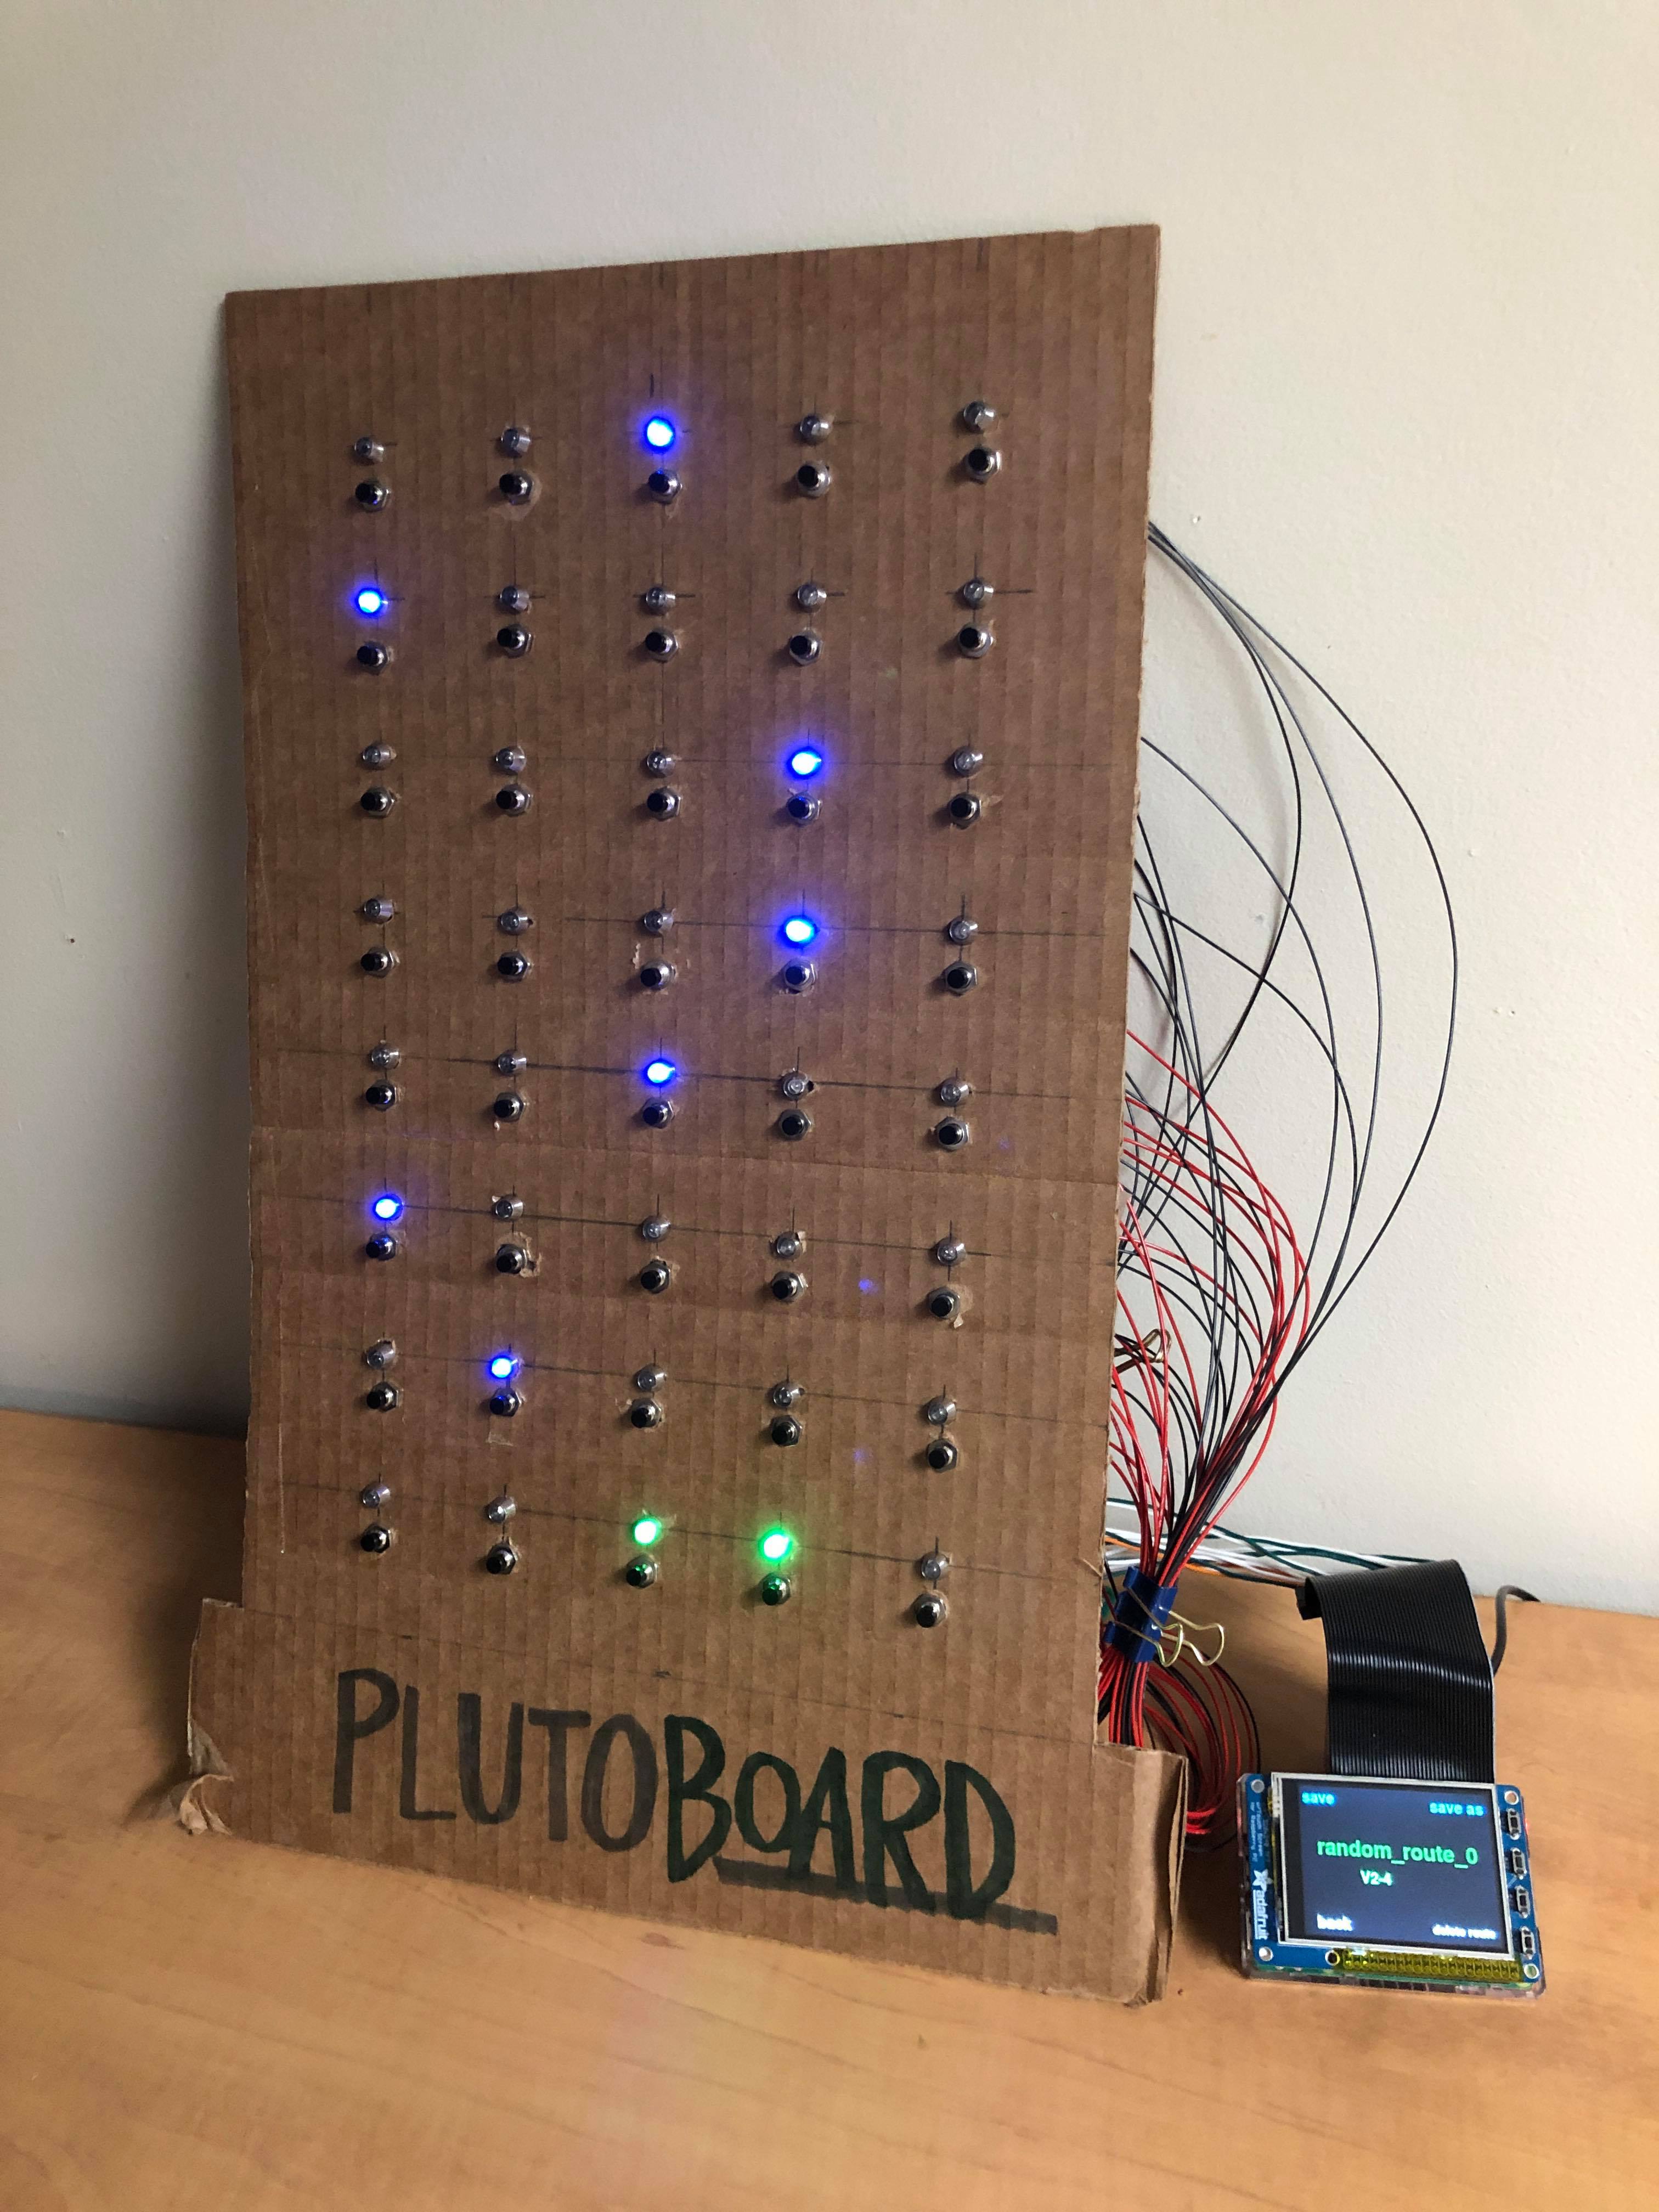 A random route.
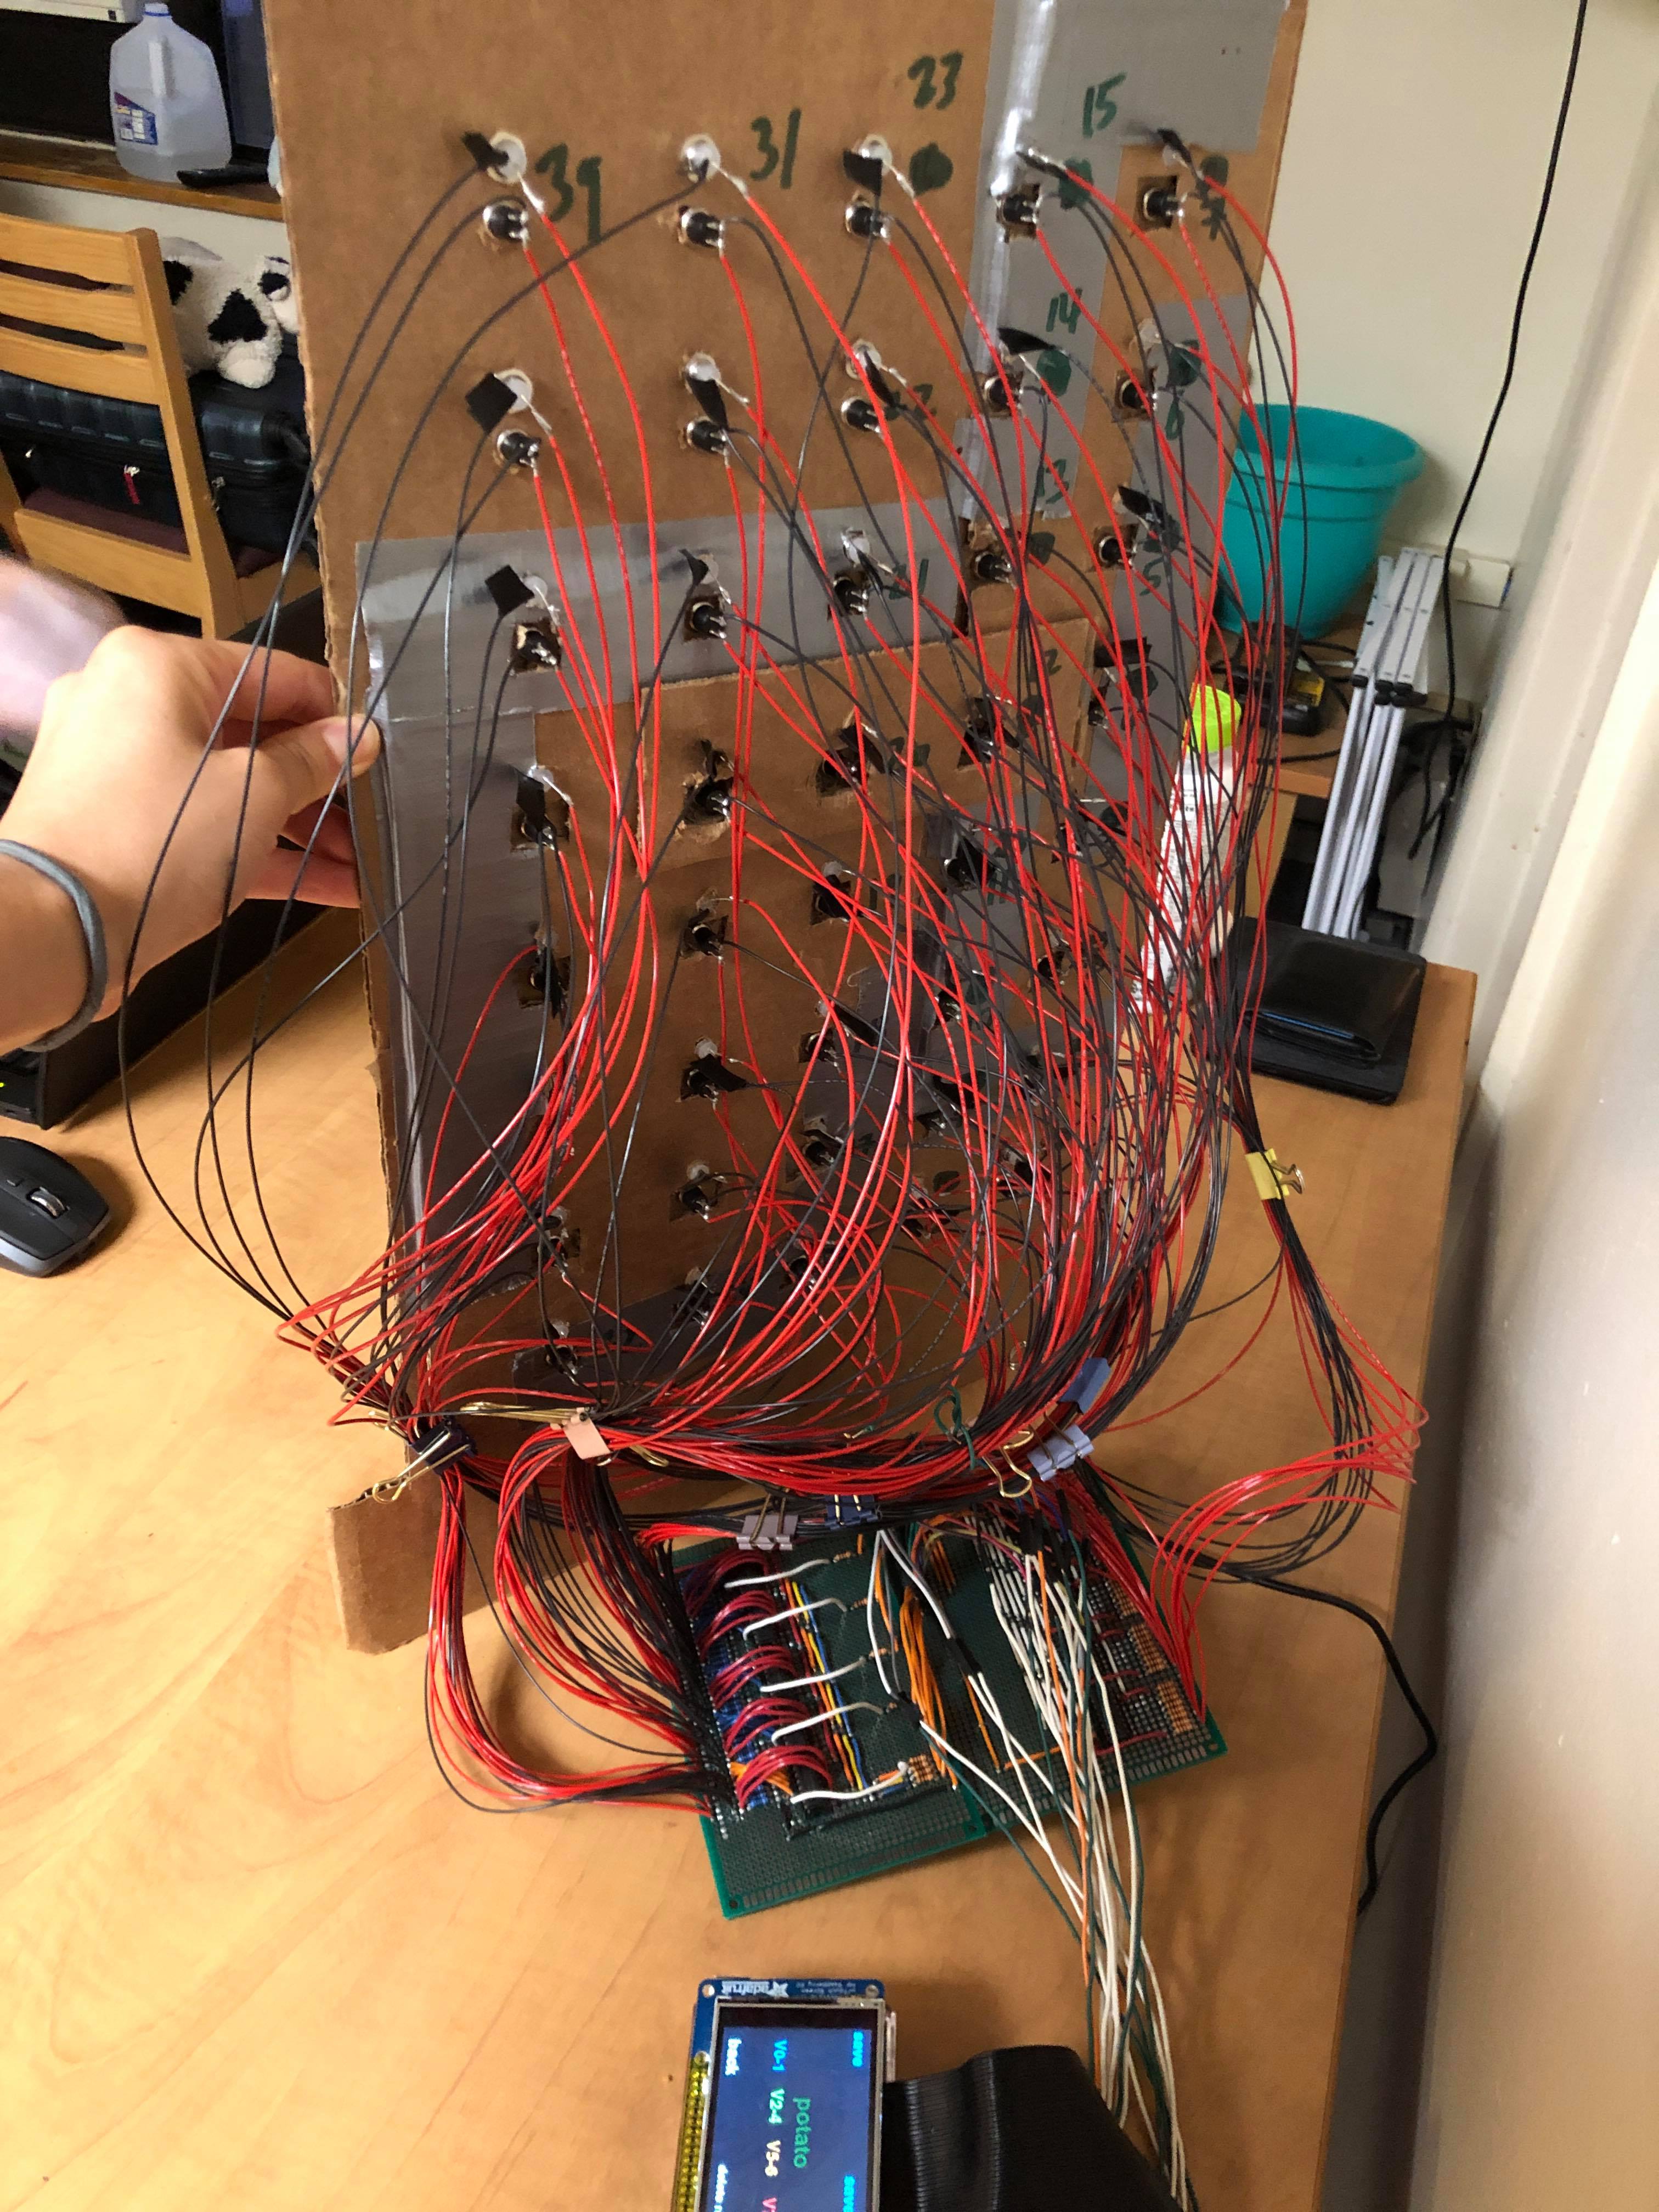 Wiring.
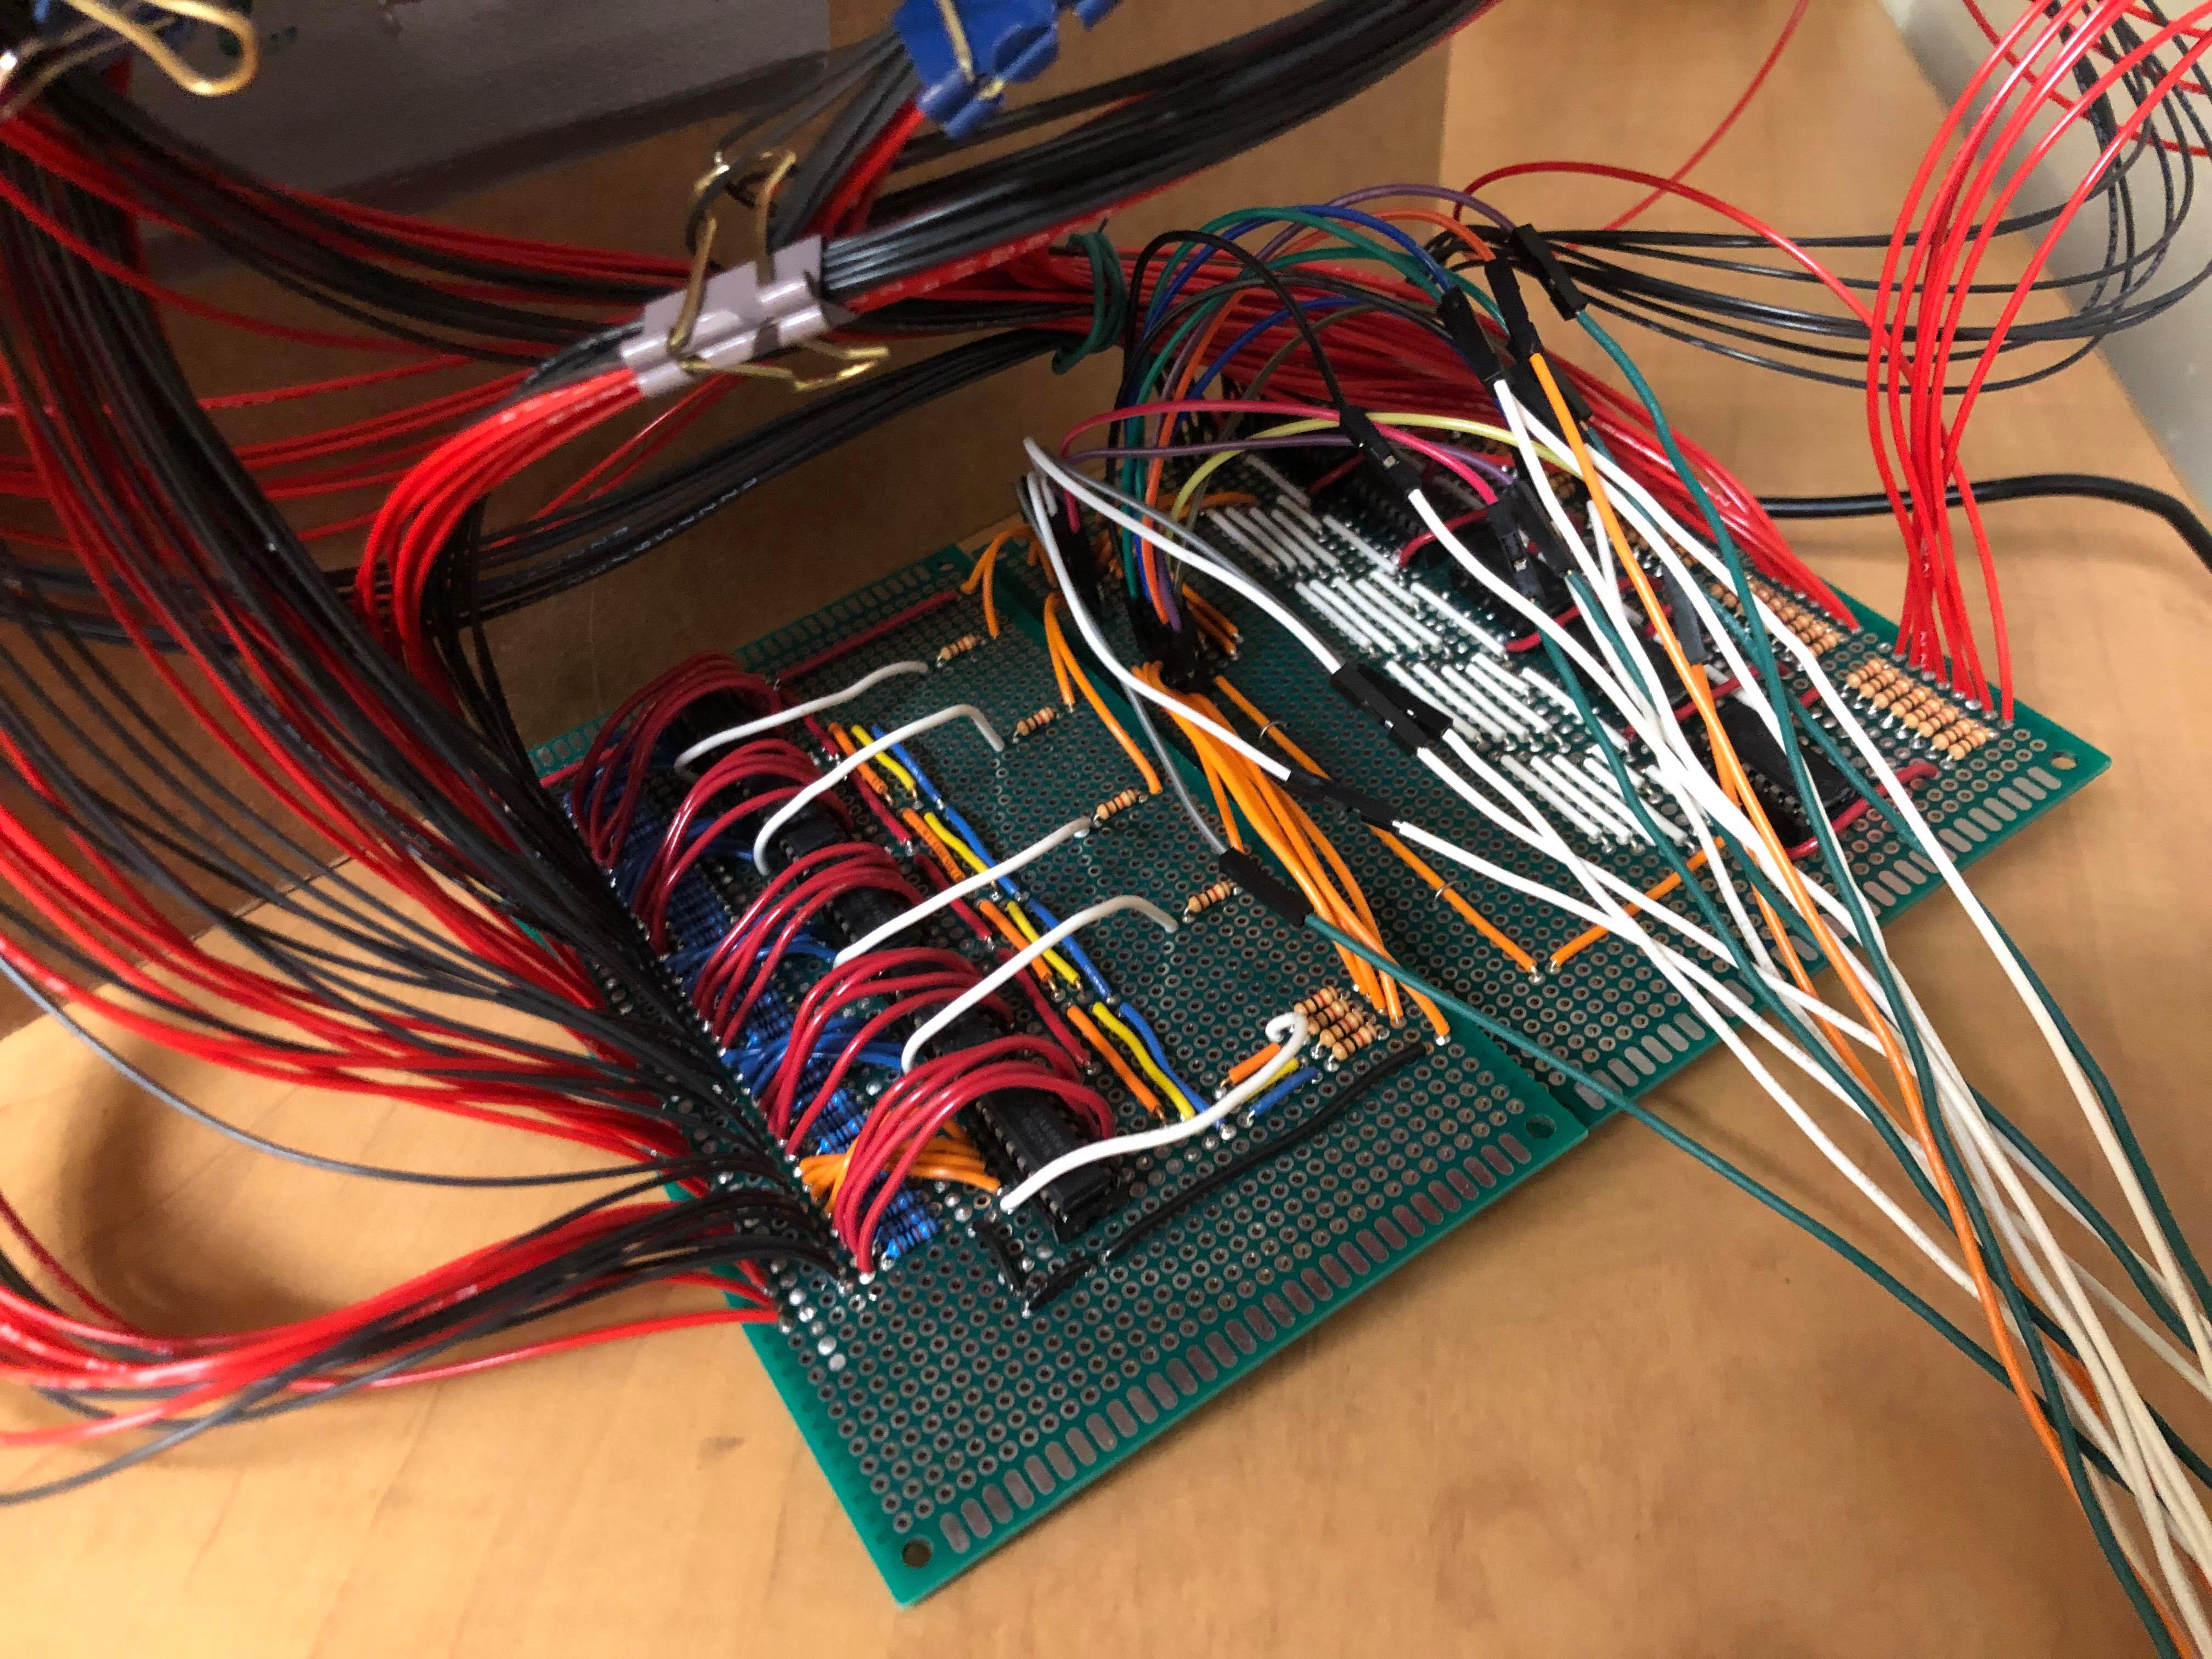 Perfboards.
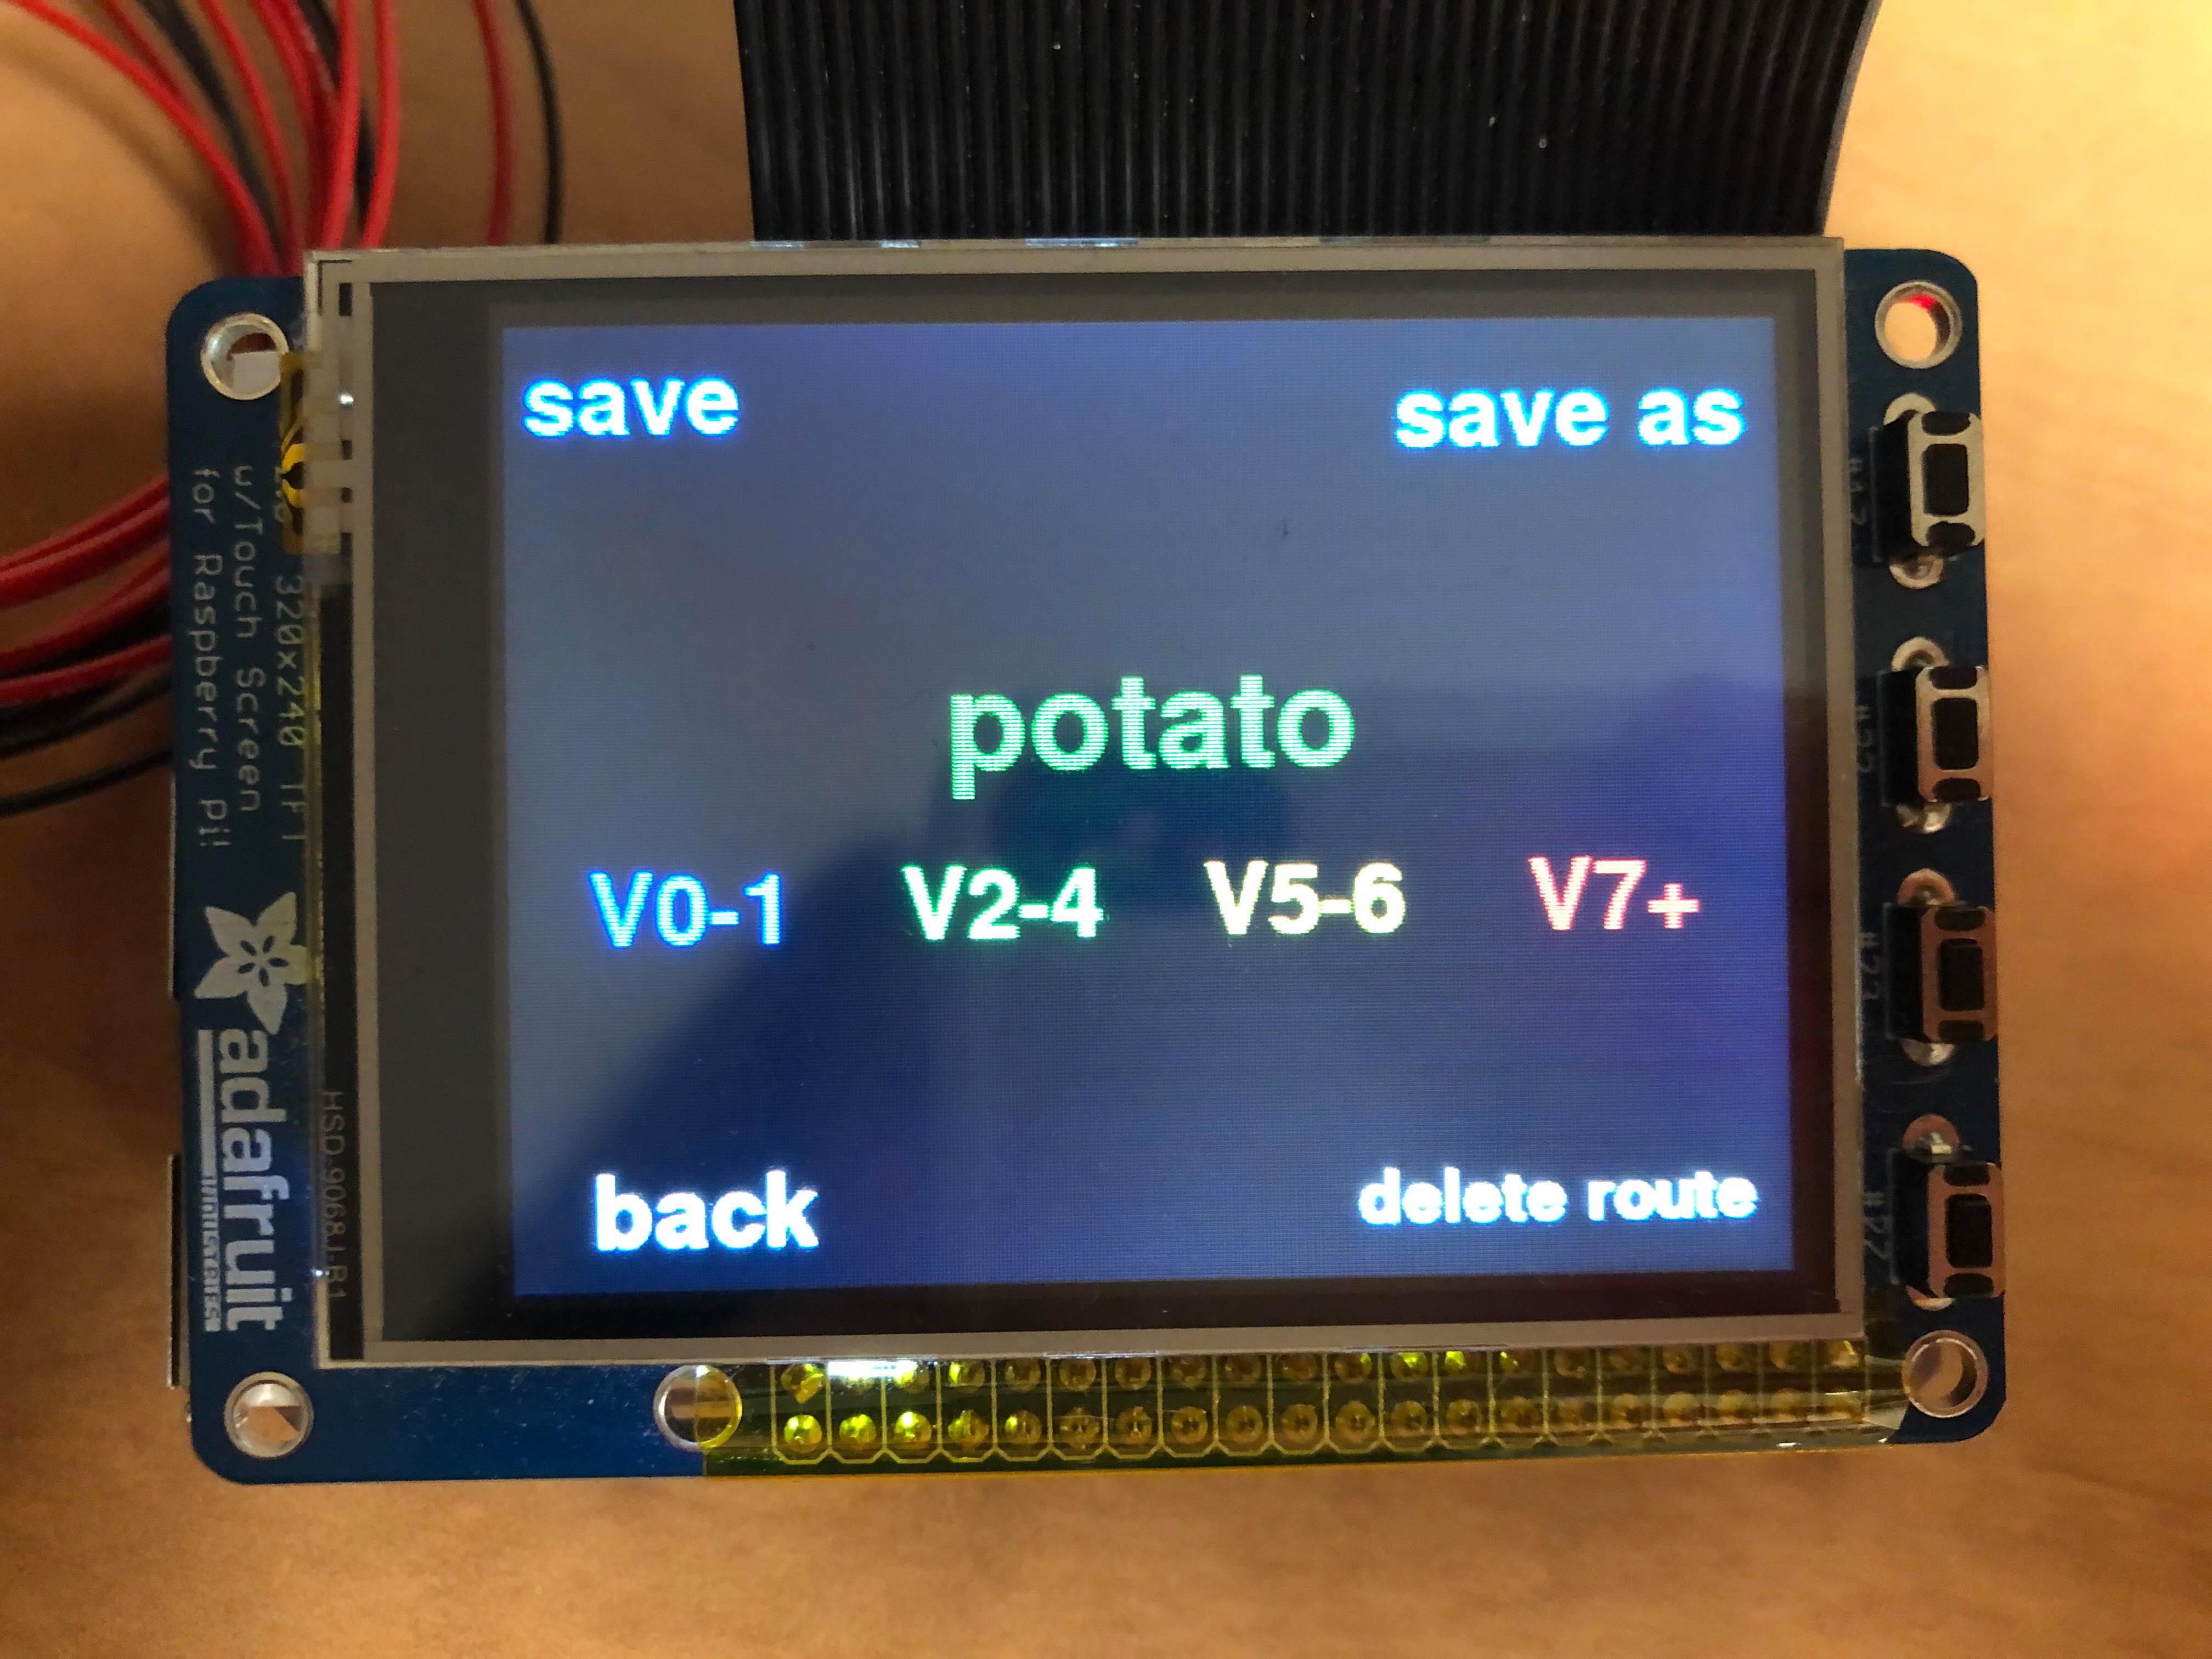 Route display page.
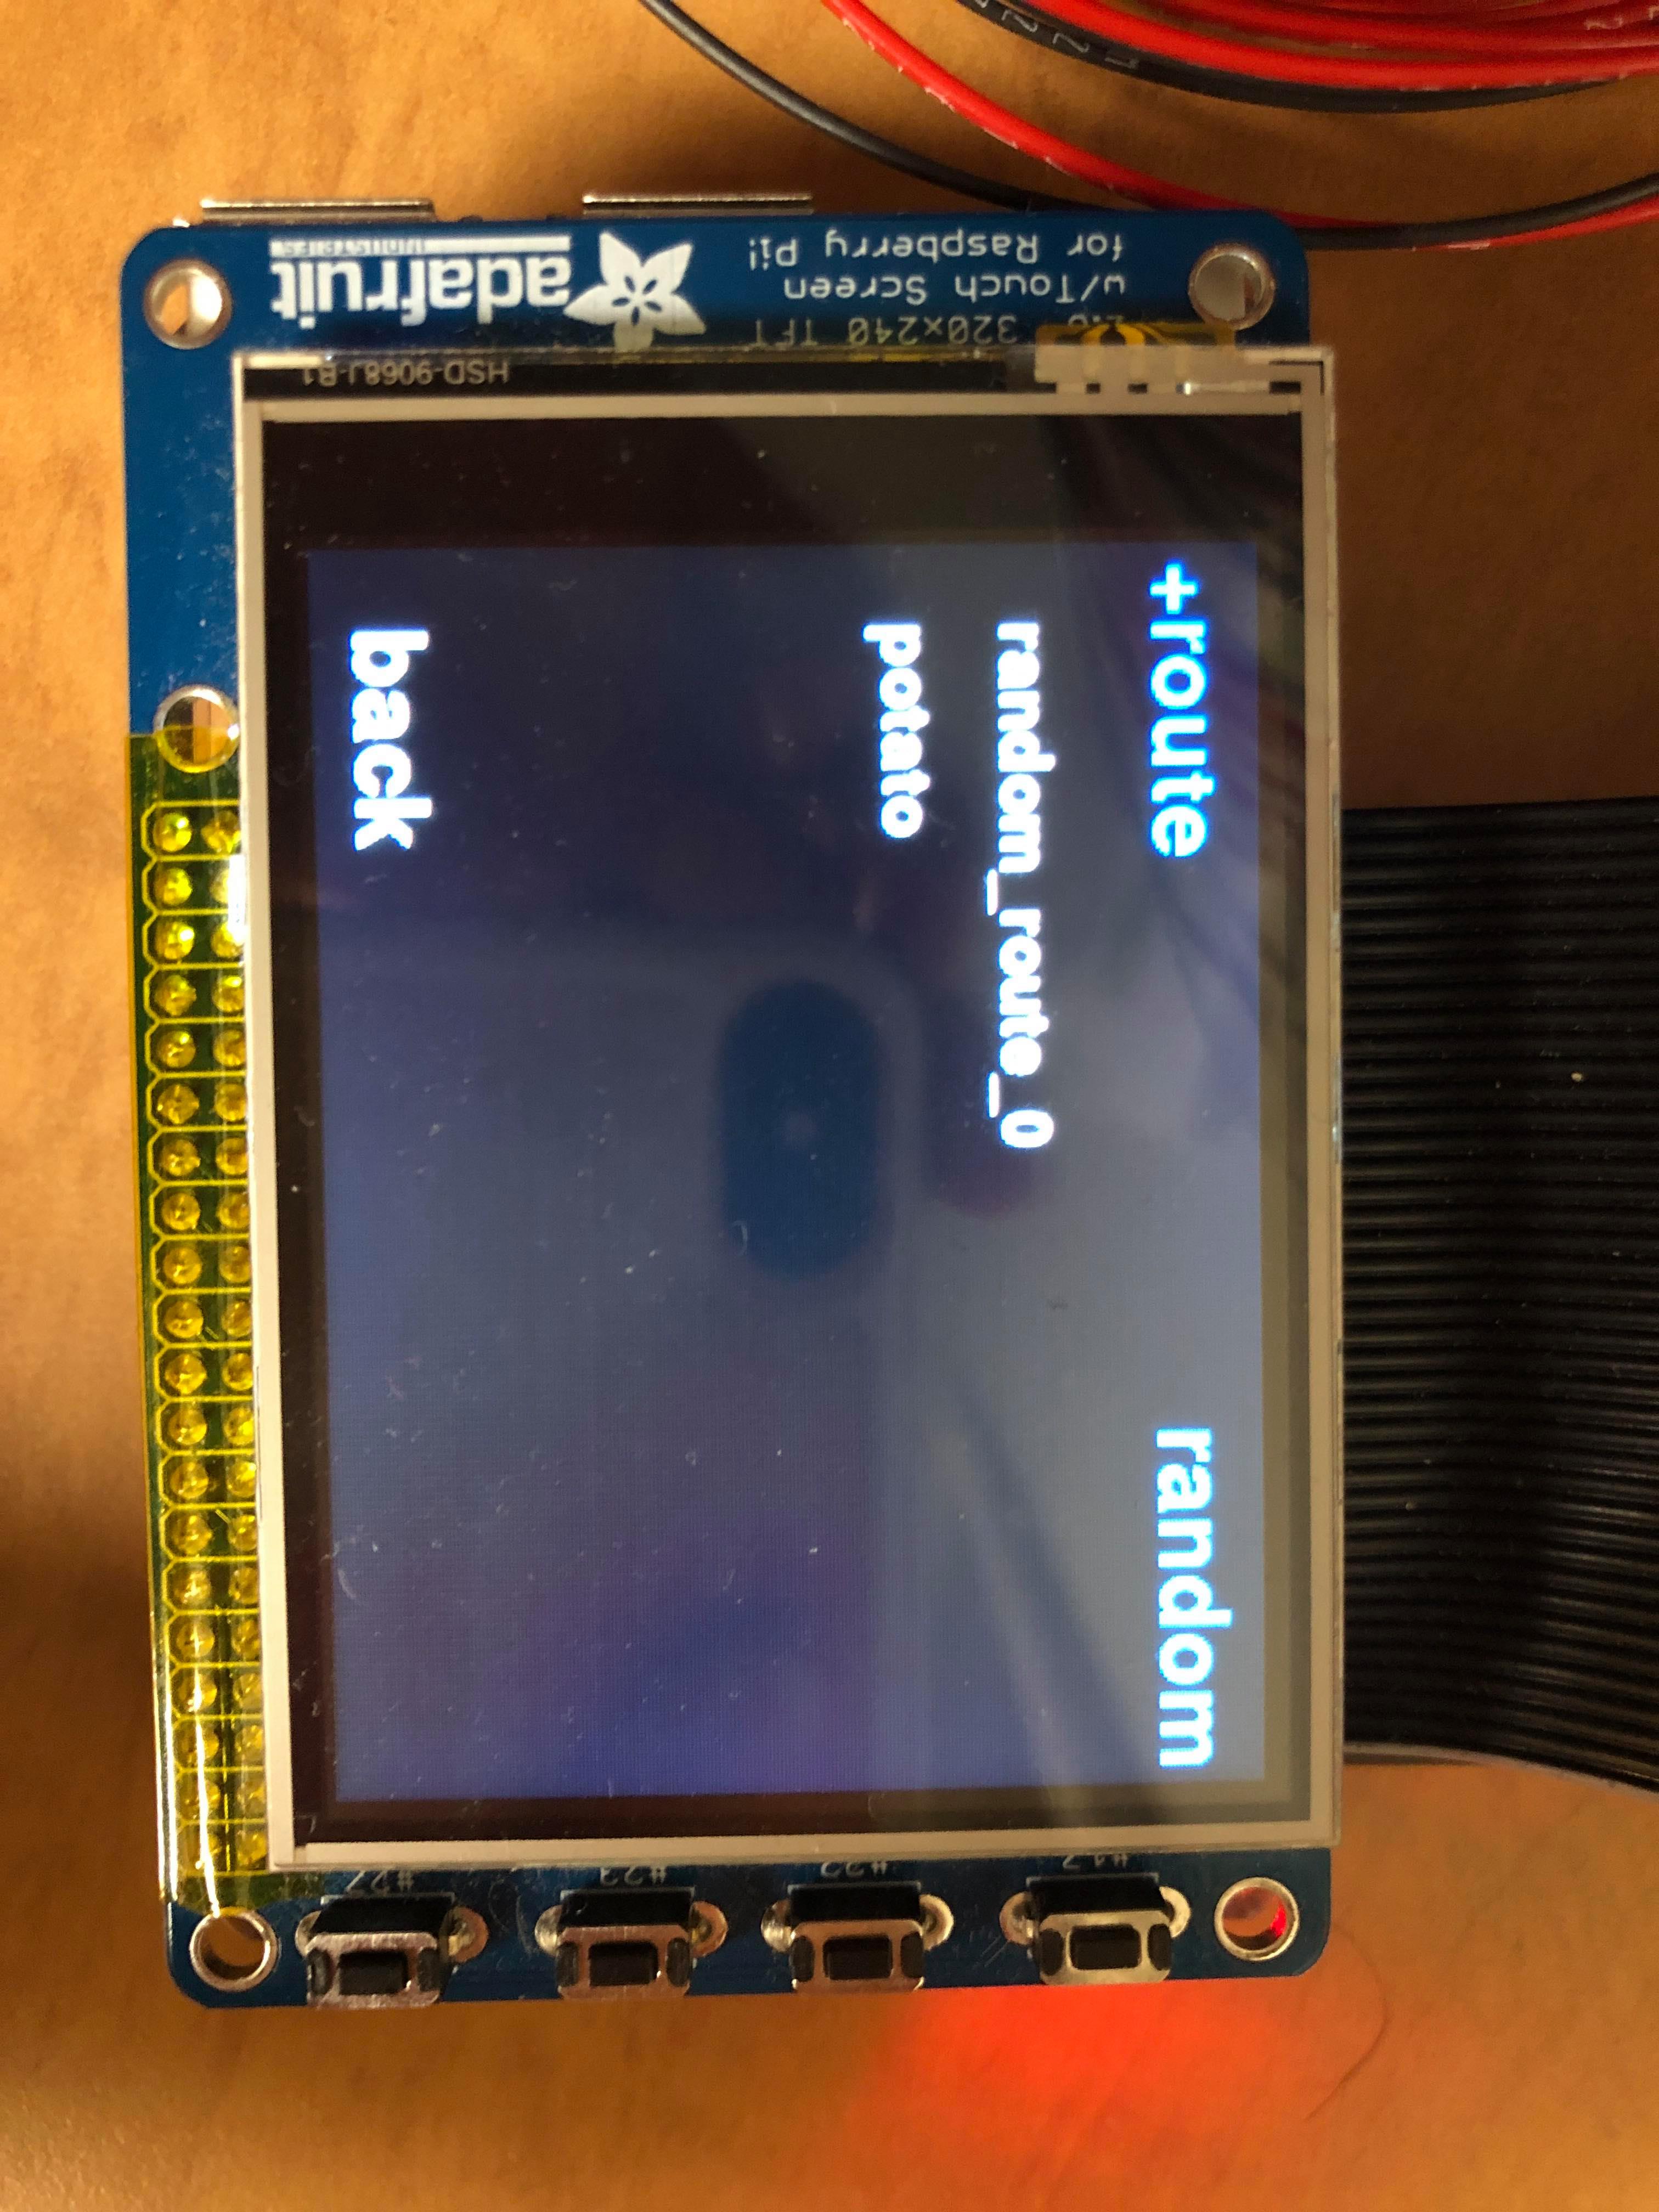 Select route menu.
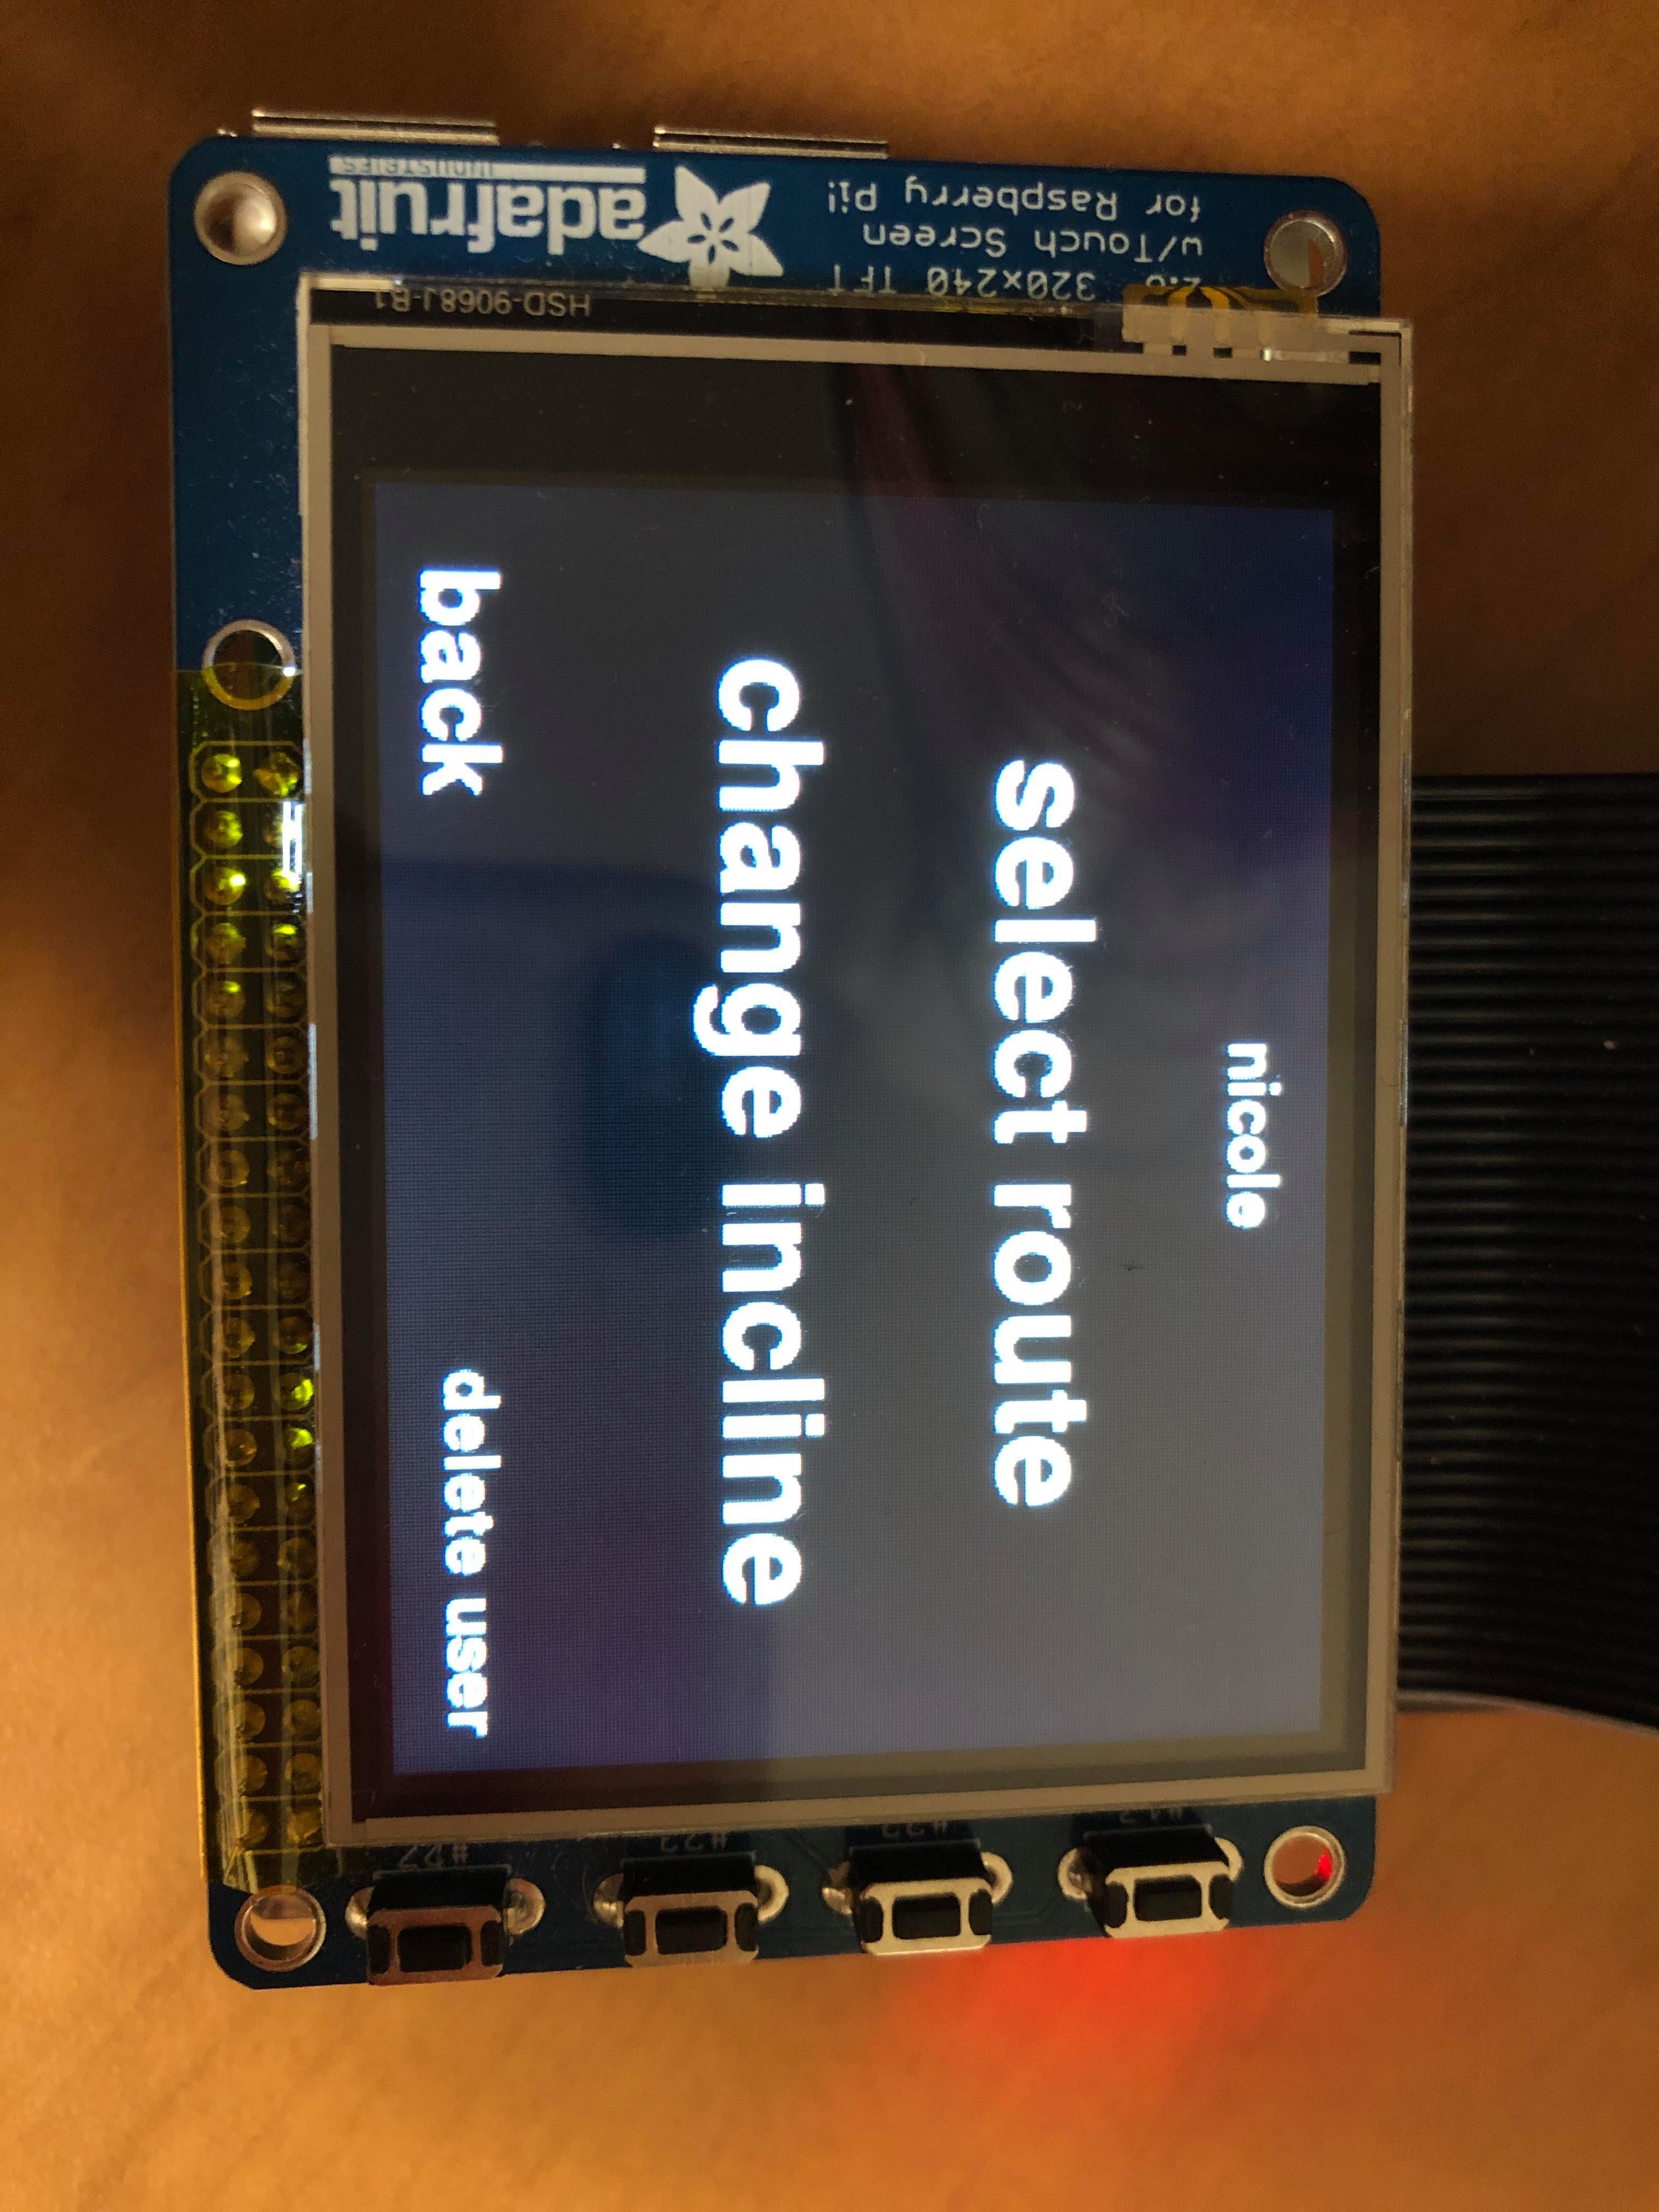 Nicole's user profile.
Schematics

Testing
After working to get initial code for both the gpio.py script (controlling the MUX's and Shift Registers) and the wall_ui.py script (controlling the user/route management), we began breadboarding and testing. Our first test was running one shift register and MUX in isolation. This meant making a fake route file and a modified gpio.py script to work with only one MUX/shift register pair. We were able to breadboard a setup and tested that the setup was able to take inputs from a button which toggled the on-state of one LED tied to a single output of the shift register, which worked. This was promising as it meant our understanding of the interaction between the button, MUX, shift register, and RPi was correct so far.
Moving on from the success, we tried to run the gpio.py script at the same time as the wall_ui.py script. This caused some concern, as we had many problems from the outset: shared GPIO signals were set up twice (one script pulled up and the other down) between the two scripts, incorrectly cleaned up GPIO signals, issues quitting both scripts simultaneously, issues passing route files between scripts, and more kept us from moving on. However, an evening of bug squashing led to us being able to run the scripts at the same time. Afer this, we moved on to implementing multiple shift registers in series. We, again, breadboarded this initially to avoid later problems, which was a smart move. After breadboarding together two buttons, two shift registers, two LEDs (one connected to each register), and two MUXs we were not able to successfully control both LEDs. We found the issue to be incorrect connection of the serial data stream between the two shift registers, and moving one wire on the breadboard after some brainstorming solved the issue. After this test, we were confident that we would be able to connect five shift registers, MUXs, and all the LEDs together without issue (as well as amend the gpio.py code to work as intended).
At this point, we began soldering components into protoboards. This took several days, including a day-long first attempt at producing a one-board setup (which failed, causing a complete restart of soldering). At the end of this soldering marathon, we had five MUX's, 40 inputs, five shift registers, 40 outputs, and some signal connections ready to route. In order to test before going any further, we connected five LEDs and five buttons to the corresponding input and outputs of the soldered boards, and tested that everything was working as planned. Surprisingly, this went off without a hitch. We were able to press the buttons to change the LEDs, save/load the state of the five LEDs on the UI, and seamlessly run both scripts. For there we had the go-ahead to cut, strip, and solder the 160 wires coming off of the actual PlutoBoard (with the buttons and LEDs). This took a few days as well, but at the end we were able to test it by simply plugging in the Pi and our 5V wall supply, and running both scripts.
The first test of the full system was unsuccessful, with the board seemingly displaying a random pattern and changing patterns every fraction of a second. In order to investigate the source of the problem, we changed the refresh frequency of the gpio.py script's periodic_refresh() function (which shifts out new bits to the registers), and the frequency of changing patterns followed suit. This was odd, but after some more thought we realized that only a few things had changed since the last test - including the power supply to the protoboards. We found the issue to be that the ground between the RPi and the 5V shift registers had not been re-tied after de-soldering the 5V power supply. Soldering these together fixed the issue. However, a new issue arose when we found that three of the buttons toggled the incorrect LED. Rather than making a software change or de-soldering the protoboard connections, we fixed this issue by de-soldering the wires on the buttons themselves and rearranging them to the correct buttons.
Result and Conclusions
After our initial design pivots (exclusion of incline control, emphasis on robust UI and reliable), everything performed as planned. We had the usual round of initial bugs when assembling and testing (as described in the above section), but after working out these kinks everything performed exactly as expected (not often this happens). We achieved all of the goals we set out to, creating an interactive route setting system with user and route managemant systems, as well as a helpful UI to navigate this process. We did not achieve what we initially hoped with the mechanical aspects of our design (the product ended up on cardboard), but for a demonstration prototype this is sufficient. We were never going to be able to actually climb on our prototype, and this serves as the major proof of concept for our idea. We can work on adding the features described in the "Future Work" section below in isolation without worrying that they may interfere with the success of this prototype, including the more advanced mechanical design.
Future Work
We plan to eventually put this design into action on a full-scale climbing wall for personal use at the very least. However, armed with the experience of having made this model prototype, so there are several changes and additions we are likely to make.
Potential Design Changes
Firstly, in scaling up this design to more holds, buttons, and LEDs, we would likely change the manufacturing process significantly. Rather than hand-soldering protoboards together, we would design a custom Printed Circuit Board with surface mounted components to alleviate a huge portion of the manufacturing effort. This would also negate the effect that increasing the number of holds/size of the board would have on this aspect of manufacturing. Wiring remains a huge effort, especially when increasing the size of the board. To further the goal of making this project manufacturable, we would design the PCB to have several board-to-wire connections, and purchase wiring looms with connectors pre-installed. We could then cut one end of these looms and install a connector of our own, allowing for a connection to the LED/button signals. This would make assembly and service much more reasonable as well. Another change which could reduce the need for wires is to use a button with an LED already enclosed.
In scaling up, we would have the need (opportunity) to maintain (or reduce) the number of GPIO we use by using larger MUXs and shift registers. We opted for 8:1 and 8-bit options, respectively, this time, but the latency of the MUX's proved to be a non-issue. We are confident we could increase the size of the MUX's without negatively affecting button latency. We chose to work with 8 bit registers this time because of the abundance of documentation for our specific register, but for the scaled up PlutoBoard (which will hold in excess of 200 holds) we would need to jump to a 64 or 128 bit register. At this point we may need to convert back to our initial idea of using BJT buffers to avoid burning up shift registers by supplying 64 or 128 LED's simultaneously.
Additions
Originally we intended to make PlutoBoard include an incline control function. Although it was not implemented on the prototype, the GPIO necessary to control a motor for this function are still available, and could be implemented in a later version, should we have the facilities necessary to manufacture the corresponding mechanical elements. There are many more suitable additions to this project which may make it more useful, enjoyable, or impressive. Two notable potential inclusions are: adding the ability to turn holds on and off using a laser pointer (enabling route setting from the ground), and some sort of difficulty assignment system for each hold on the wall. The latter would enable more accurate creation of random routes according to the difficulty selected by the user, by informing the random route function of which holds are the hardest for the user to hold.
Work Distribution

Group Members

Nicole Lin, ECE '21
nl392@cornell.edu
Designed the hardware and wrote GPIO code. Split soldering and wire stripping duties. Split testing and debugging during assembly.
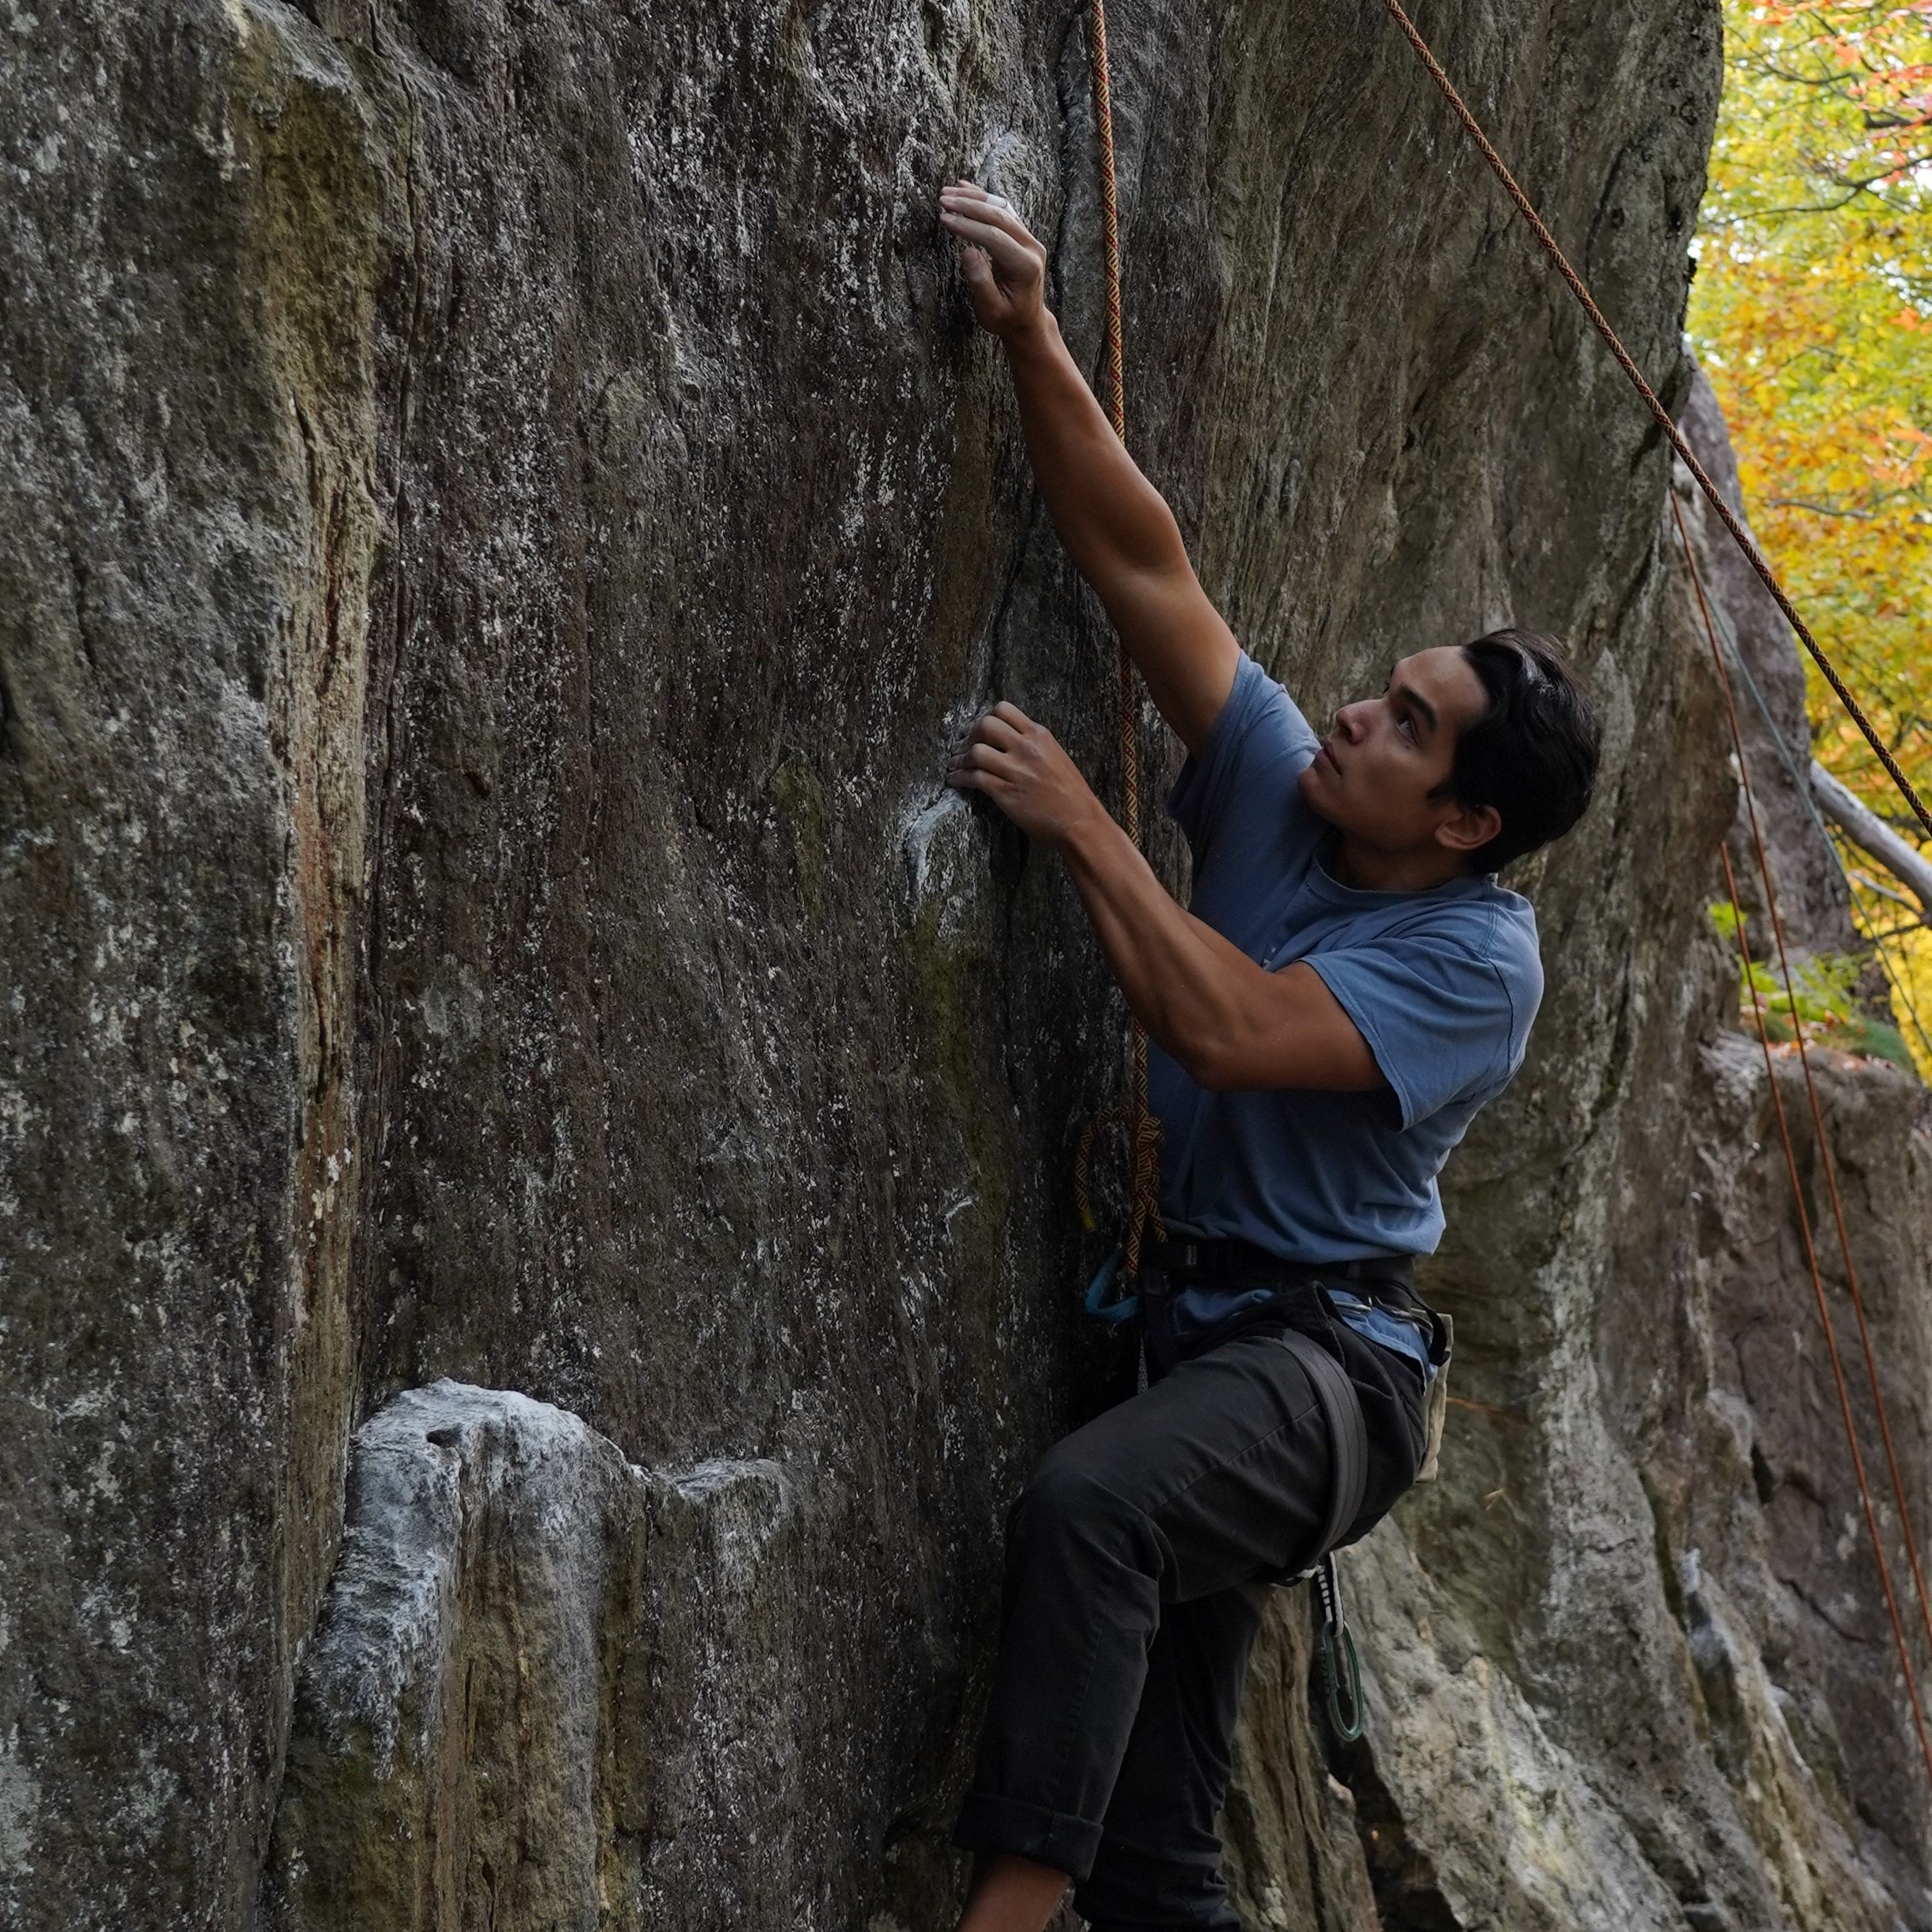
Joseph Benjamin, MAE '20
jkb237@cornell.edu
Designed and wrote UI code, designed file structure. Split soldering and wire stripping duties. Split testing and debugging during assembly.
Parts List
- Raspberry Pi 3B $35.00
- Adafruit PiTFT Touchscreen Display $35
- 40 5mm LEDs $1.60
- 40 5mm LED Holders $12.80
- 40 Panel-Mount Momentary Switches $24
- 5x SN74HC251N 8:1 MUX $3
- 5x SN74HC595N 8-Bit shift Registers $2.85
- 10x 16-DIP Sockets $4.94
- 5x .1uF Ceramic Capacitors $1.25
- 40x 10k Resistors $1.76
- 53x 1k Resistors $1.92
- 2x Perforated Boards (9x15cm) $6
- 100g, 60/40 .6mm Solder $9.19
- 5V Wall Power Supply $5
- Stranded and solid core wire provided by lab
Total: $144.31
References
Arduino ShiftOutDriving LEDs by 74HC595
PiTFT schematic
Python Data Structures
Python decimal to binary
Python I/O
RPi GPIO Documentation
RPi GPIO Pinout
RPi GPIO Python Module
RPi Power Limits
SN74HC251N datasheet
SN74HC595N datasheet
Code Appendix
wall_ui.py
## nl392_jkb237
## final project
## wall_ui.py

###################################################################################################
## SYSTEM SETUP

import RPi.GPIO as GPIO
import time
import sys
import pygame
import os
import os.path
import shutil
import random
from shutil import copyfile
from os import path
from pygame.locals import *

os.putenv('SDL_VIDEODRIVER','fbcon')
os.putenv('SDL_FBDEV','/dev/fb1')
os.putenv('SDL_MOUSEDRV','TSLIB')
os.putenv('SDL_MOUSEDEV','/dev/input/touchscreen')

# initialize pygame and hide mouse on screen
pygame.init()
pygame.mouse.set_visible(False)

# quit button setup
GPIO.setmode(GPIO.BCM) # set pin numbering scheme to that of Broadcom chip
GPIO.setup(27, GPIO.IN, pull_up_down=GPIO.PUD_UP)
def GPIO27_callback(channel):
    quit()
GPIO.add_event_detect(27, GPIO.FALLING, callback=GPIO27_callback)

# screen resolution
size = w,h = 320,240
screen = pygame.display.set_mode(size)

###################################################################################################
## INITIALIZE VARIABLES

# RGB values
WHT = 255,255,255
BLK = 0,0,0
RED = 128,0,0
GRN = 0,128,0
BLU = 0,155,255
GRY = 128,128,128
v01 = 0,100,255
v24 = 0,255,50
v56 = 255,200,0
v7 = 255,25,0
diffColors = [v01,v24,v56,v7]

# font sizes
med_h = 35
sm_h = 25
lg_h = 50
med_font = pygame.font.Font(None,med_h)
sm_font = pygame.font.Font(None,sm_h)
lg_font = pygame.font.Font(None,lg_h)

# initial menu states and initialize variables
running = True
menu = 'main' # used to navigate menus
user = 0 # variable which indexes through list of users, indicating current users
users = [] # list of users
letter = '' # user input variable for letter entry menus
route = 0 # variable which indexes through list of user routes, indicating current route
current_route = 0 # route currently displayed on the board, similar to route variable
nRoute = '' # concatenated letters of new route string
nUser = '' # concatenated letters of new user string
nRouteStr = [] # letters of new route string
nUserStr = [] # letters of new user string
confirmOrigin = '' # used to indicate which menu the user came from before the current confirmation menu
difficulty_selected = False # flag indicating if user has selected desired random route difficulty
randomRoute = False # flag indicating if user is on a routedisplay for a freshly created random route
stackChance = .3 # probability that two holds will be permitted to be directly above and below one another
diffs = ['V0-1','V2-4','V5-6','V7+'] # list of difficulties
diffListY = 145
diffPos = [(45,diffListY),(122,diffListY),(198,diffListY),(275,diffListY)]
difficulty = 4

###################################################################################################
## HELPER FUNCTIONS

# helper function to blit text to screen with specific alignment, color, size, and position
def blit_button(text,font,color,alignment,pos):
    text_surface = font.render(text,True,color)
    if alignment is 'midleft':
        rect = text_surface.get_rect(midleft=pos)
    elif alignment is 'midright':
        rect = text_surface.get_rect(midright=pos)
    elif alignment is 'midtop':
        rect = text_surface.get_rect(midtop=pos)
    elif alignment is 'topleft':
        rect = text_surface.get_rect(topleft=pos)
    elif alignment is 'bottomright':
        rect = text_surface.get_rect(bottomright=pos)
    elif alignment is 'bottomleft':
        rect = text_surface.get_rect(bottomleft=pos)
    elif alignment is 'topright':
        rect = text_surface.get_rect(topright=pos)
    else:
        rect = text_surface.get_rect(center=pos)
    screen.blit(text_surface,rect)


# helper function to update user list and users.txt
def update_userstxt():
    userfile = open('users.txt','w') # open blank file
    for userline in users: # write new line for each user
        userfile.writelines(userline+'\n')
    userfile.close() # close file

# helper function to update padding and spacing values
def update_padNspace():
    global spacing
    if len(users)<=3:
        spacing = 60
    elif len(users)<=5:
        spacing = 40
    global padding
    padding = (240-len(users)*(spacing))/2

# function to generate random route
def randRoute(diff,routename):
    column = [0,0,0,0,0,0,0,0]
    newRoute = []
    for row in range(8):
        if row is 0:
            # make bottom row (2 holds)
            holds = 2 # number of holds possible in a certain row
            miss = .1 # probability that any one hold will not be "generated" as "on"
            botRow = True
        elif row is 7:
            # make top row (1 hold)
            holds = 1
            miss = 0
        else:
            if diff is 0:
                holds = 2
                miss = .15
            elif diff is 1:
                holds = 2
                miss = .3
            elif diff is 2:
                holds = 1
                miss = .15
            elif diff is 3:
                holds = 1
                miss = .3
        # make a random row
        if not botRow: # dont store the previous row for the bottom row (there isn't one)
            prevRow = newRow
        else:
            prevRow = [0,0,0,0,0] # assume no holds on the row previous to the bottom row
        newRow = [0,0,0,0,0]
        holdInRow = False # start with a blank row
        if sum(prevRow) is 0: # keep track of whether or not the previous row had no holds
            aboveBlank = True
        else:
            aboveBlank = False
        locSearch = True
        for x in range(holds):
            while locSearch is True:
                location = int(round(random.random()*4)) # propose a possible new location (column coordiante) for a hold
                if prevRow[location] is 1: # if the previous row had a hold in the same column, keep looking, but do a roll for a chance to have "stacked" holds
                    locSearch = True
                    stackRoll = random.random()
                    if stackChance > stackRoll: # roll for chance to "stack" holds
                        locSearch = False
                elif prevRow[location] is 0: # if the previous row did not have a hold in the same column, we have found the location for the new holds
                    locSearch = False
            roll = random.random() # random roll
            # add a hold at the location from the search if the roll "hits", or if the previous row was blank and this is the last possible hold in this row unless diff > 1
            if miss < roll or ((aboveBlank is True) and (holdInRow is False and x is holds-1) and diff <=1):
                newRow[location] = 1
                holdInRow = True
        newRoute.append(newRow)
    routefile = open(users[user]+'/routes/'+routename+'.txt','w') # open blank file
    for columnindex in range(5): # current row
        for rowindex in range(8): # current row
            column[rowindex] = str(newRoute[rowindex][columnindex]) # grab hold value from current row for current column
        routefile.writelines(''.join(column)+'\n') # store column as a line
    routefile.close() # close file
    routefile = open(users[user]+'/routes/'+routename+'.txt','a') # open populated file
    routefile.write('diff: \n'+str(diff)+'\n') # append on the difficulty tags
    routefile.close() # close file

# helper function to show blank board
def blank_board():
    copyfile('blank_board.txt','current_board.txt')

# helper function to load current route to current board
def load_route(user,route):
    copyfile(users[user]+'/routes/'+userRoutes[route]+'.txt','current_board.txt') # loads current route into current board

# check the difficulty level of a route
def check_diff(user,route):
    routefile = open(users[user]+'/routes/'+userRoutes[route]+'.txt','r') # open populated file
    for lastline in routefile: # iterates through all the lines
        pass
    return int(lastline) # lastline ends up being the contents of the final line of the file (str of difficulty)
    routefile.close()

# change the difficulty level of the displayed route
def change_diff(newdiff):
    routelines = open('current_board.txt','r').readlines() # gets each line of the route file, storing in a list
    routelines[-1] = str(newdiff)+'\n' # changes difficulty tag to the new difficulty
    open('current_board.txt','w').writelines(routelines) # rewrites all the lines to the currentboard with updated difficulty

# helper function to load routes for specified user
def load_userRoutes(usernum):
    global userRoutes
    global userRouteCount
    userRoutes = os.listdir(users[usernum]+'/routes') # makes a list of all the route files in the user's directory
    userRouteCount = len(userRoutes) # counts how many users there are, for the padding and spacing of the user menu
    for i in range(userRouteCount):
        userRoutes[i] = os.path.splitext(userRoutes[i])[0] # removes the .txt from each route name
    print(userRoutes)

###################################################################################################
## MAIN LOOP SETUP

# load users
userfile = open('users.txt','r')
usercount = 0

while True:
    users.append(userfile.readline().rstrip('\n')) # add line contents to users list, minus newline
    if not users[usercount]: # if the line was empty, delete the user that was created and exit
        users.pop(len(users)-1)
        break
    elif not path.exists(users[usercount]):
        os.mkdir(users[usercount])
    if not path.exists(users[usercount]+'/routes'):
        os.mkdir(users[usercount]+'/routes')
    usercount +=1

userfile.close() # be sure to close file

update_padNspace()

###################################################################################################
## MAIN LOOP

while running:
    if len(users)<1:
        menu = '+user'

    # get mouseclick and sort it into a command based on screen location
    for event in pygame.event.get():
        if event.type is MOUSEBUTTONUP:
            pos = pygame.mouse.get_pos()
            x,y = pos
            print('location: x:'+str(x)+' y:'+str(y))
            if menu is 'main': # select or create user
                if x>130 and x<190:
                    if y>65 and y<115: # select
                        menu = 'user'
                    elif y>125 and y<175: # create
                        if len(users)<5: # maximum 5 users
                            del nUserStr[:] # clear new user name before going to menu
                            menu = '+user'
                        else:
                            pass
            elif menu is 'user': # list of users
                if x>70 and x<250:
                    if y>padding and y<(padding+lg_h): # if clicked on first user's name
                        user = 0 # used to track which user is currently being accessed
                        load_userRoutes(user) # updates list of routes which belong to the user
                        menu = 'actions'
                    if len(users)>1:
                        if y>padding+spacing and y<(padding+spacing+lg_h):
                            user = 1
                            load_userRoutes(user)
                            menu = 'actions'
                    if len(users)>2:
                        if y>padding+2*spacing and y<(padding+2*spacing+lg_h):
                            user = 2
                            load_userRoutes(user)
                            menu = 'actions'
                    if len(users)>3:
                        if y>padding+3*spacing and y<(padding+3*spacing+lg_h):
                            user = 3
                            load_userRoutes(user)
                            menu = 'actions'
                    if len(users)>4:
                        if y>padding+4*spacing and y<(padding+4*spacing+lg_h):
                            user = 4
                            load_userRoutes(user)
                            menu = 'actions'
                if x>5 and x<90 and y>195 and y<225:
                    menu = 'main'
            elif menu is '+user': # keyboard to enter new user
                if 850: # back button
                    menu = 'main'
                elif x>260 and x<310 and y>195 and y<225: # backspace button
                    if len(nUserStr)>0:
                        nUserStr.pop(len(nUserStr)-1)
                    else:
                        pass
                elif 120130 and x<190:
                    if 505 and x<90 and y>195 and y<225: # back button
                    menu = 'user'
                elif 210195 and y<225: # back button
                    menu = 'actions'
                elif 050:
                    if 50 0:
                        route = 0 # used to track which route is currently being accessed
                        menu = 'routedisplay'
                        load_route(user,route) # copies the route we selected to the current_board.txt
                        difficulty = int(check_diff(user,route)) # updates the difficulty for display purposes
                    elif 80 1:
                        route = 1
                        menu = 'routedisplay'
                        load_route(user,route)
                        difficulty = int(check_diff(user,route))
                    elif 110 2:
                        route = 2
                        menu = 'routedisplay'
                        load_route(user,route)
                        difficulty = int(check_diff(user,route))
                    elif 140 3:
                        route = 3
                        menu = 'routedisplay'
                        load_route(user,route)
                        difficulty = int(check_diff(user,route))
                elif 160 4:
                        route = 4
                        menu = 'routedisplay'
                        load_route(user,route)
                        difficulty = check_diff(user,route)
                    elif 50 5:
                        route = 5
                        menu = 'routedisplay'
                        load_route(user,route)
                        difficulty = check_diff(user,route)
                    elif 80 6:
                        route = 6
                        menu = 'routedisplay'
                        load_route(user,route)
                        difficulty = check_diff(user,route)
                    elif 110 7:
                        route = 7
                        menu = 'routedisplay'
                        load_route(user,route)
                        difficulty = check_diff(user,route)
                    elif 140 8:
                        route = 8
                        menu = 'routedisplay'
                        load_route(user,route)
                        difficulty = check_diff(user,route)
                else:
                    pass
            elif menu is '+route' or menu is 'saveas': # keyboard to enter new route
                if 85260 and x<310 and y>195 and y<225: # backspace button
                    if len(nRouteStr)>0:
                        nRouteStr.pop(len(nRouteStr)-1)
                    else:
                        pass
                elif 1205 and x<90 and y>195 and y<225: # back button
                    if randomRoute is True:
                        randomRoute = False
                    menu = 'routes'
                elif 2105 and x<90 and y>195 and y<225: # back button
                    menu = 'actions'
            elif menu is 'confirm': # confirmation menu
                if 505 and x<90 and y>195 and y<225: # back button
                    menu = 'routes'
                elif 1000:
#        print('user name: ' + users[user])

    ################################################################################################
    ## BLIT NEW DISPLAY

    #blank display
    screen.fill(BLK)
    nRoute = ''.join(nRouteStr)
    nUser = ''.join(nUserStr)

    if menu is 'main':
        blit_button('select user',lg_font,WHT,'center',(160,90)) # select user button
        if len(users)<5: # only blit white create user button if <5 users
            blit_button('create user',lg_font,WHT,'center',(160,150))
        else: # otherwise gray out create user button
            blit_button('create user',lg_font,GRY,'center',(160,150))
    elif menu is 'user':
        i = 0
        for username in users: # blit each user name according to locations calculated by update_padNspace()
            blit_button(username,lg_font,WHT,'midtop',(160,padding+spacing*i))
            i+=1
        blit_button('back',med_font,WHT,'midleft',(20,220))
    elif menu is '+user':
        if nUser in users:
            blit_button('user exists',sm_font,RED,'midtop',(160,10))
            blit_button('ENTER',med_font,GRY,'center',(160,220)) # enter button
        else:
            blit_button('enter new user name',sm_font,WHT,'midtop',(160,10)) # prompt for new name
            blit_button('ENTER',med_font,WHT,'center',(160,220)) # enter button
        blit_button('Q  W  E  R  T  Y  U  I  O  P',med_font,WHT,'center',(160,100)) # keyboard row 1
        blit_button('A  S  D  F  G  H  J  K  L',med_font,WHT,'center',(160,140)) # keyboard row 2
        blit_button('Z  X  C  V  B  N  M',med_font,WHT,'center',(160,180)) #keyboard row 3
        if len(users)>0:
            blit_button('back',med_font,WHT,'midleft',(20,220)) # back button, only allowed if there is a profile in existence
        else:
            blit_button('back',med_font,GRY,'midleft',(20,220)) # back button, only displayed if there is a profile in existence
        pygame.draw.line(screen,WHT,(300,220),(270,220),3) # arrow
        pygame.draw.line(screen,WHT,(270,220),(278,210),3) # arrow
        pygame.draw.line(screen,WHT,(270,220),(278,230),3) # arrow
        blit_button(''.join(nUserStr),med_font,WHT,'center',(160,55)) # current user name input
    elif menu is 'actions':
        blit_button(users[user],sm_font,WHT,'midtop',(160,10)) # show user's name at the top
        blit_button('select route',lg_font,WHT,'center',(160,75)) # select route button
        blit_button('change incline',lg_font,WHT,'center',(160,145)) # change incline button
        blit_button('delete user',sm_font,WHT,'bottomright',(310,230)) # delete the user's profile
        blit_button('back',med_font,WHT,'midleft',(20,220)) # back button
    elif menu is 'routes':
        j = 0
        for routename in userRoutes: # list routes
            if j<4:
                blit_button(routename,sm_font,WHT,'topleft',(20,50+j*30)) # left column
            if 4<=j<8:
                blit_button(routename,sm_font,WHT,'topright',(300,50+(j-4)*30)) # right column
            j+=1
        blit_button('+route',med_font,BLU,'topleft',(5,5)) # add new route button
        blit_button('random',med_font,BLU,'topright',(315,5)) # add random route button
        blit_button('back',med_font,WHT,'midleft',(20,220)) # back button
    elif menu is 'routedisplay':
        blit_button(userRoutes[route],lg_font,GRN,'center',(160,100)) # route name
        blit_button('save as',med_font,BLU,'topright',(310,10)) # save as button
        blit_button('save',med_font,BLU,'topleft',(5,5)) # add new route button
        blit_button('delete route',sm_font,WHT,'bottomright',(310,230)) # delete the route
        blit_button('back',med_font,WHT,'midleft',(20,220)) # back button
        if difficulty<4:
            blit_button(diffs[difficulty],med_font,diffColors[difficulty],'center',diffPos[difficulty])
        else:
            for diffButton in range(4):
                blit_button(diffs[diffButton],med_font,diffColors[diffButton],'center',diffPos[diffButton])
    elif menu is '+route' or menu is 'saveas':
        if nRoute in userRoutes: # if new route name already exists
            blit_button('route exists',sm_font,RED,'midtop',(160,10))
            blit_button('ENTER',med_font,GRY,'center',(160,220)) # enter button
        else:
            blit_button('enter new route name',sm_font,WHT,'midtop',(160,10)) # prompt for new name
            blit_button('ENTER',med_font,WHT,'center',(160,220)) # enter button
        blit_button('Q  W  E  R  T  Y  U  I  O  P',med_font,WHT,'center',(160,100)) # keyboard row 1
        blit_button('A  S  D  F  G  H  J  K  L',med_font,WHT,'center',(160,140)) # keyboard row 2
        blit_button('Z  X  C  V  B  N  M',med_font,WHT,'center',(160,180)) #keyboard row 3
        blit_button('back',med_font,WHT,'midleft',(20,220)) # back button, only allowed if there is a profile in existence
        pygame.draw.line(screen,WHT,(300,220),(270,220),3) # arrow
        pygame.draw.line(screen,WHT,(270,220),(278,210),3) # arrow
        pygame.draw.line(screen,WHT,(270,220),(278,230),3) # arrow
        blit_button(''.join(nRouteStr),med_font,WHT,'center',(160,55)) # current route name input
    elif menu is 'incline':
        blit_button('INCLINE',lg_font,WHT,'center',(160,120))
        blit_button('back',med_font,WHT,'midleft',(20,220)) # back button
    elif menu is 'confirm':
        blit_button('are you sure?',lg_font,WHT,'center',(160,40))
        blit_button('yes',lg_font,WHT,'midleft',(50,140))
        blit_button('cancel',lg_font,WHT,'midright',(270,140))
    elif menu is 'random':
        blit_button('select difficulty',sm_font,WHT,'midtop',(160,10))
        blit_button('v0-v1',med_font,v01,'center',(160,60))
        blit_button('v2-v4',med_font,v24,'center',(160,100))
        blit_button('v5-v6',med_font,v56,'center',(160,140))
        blit_button('v7+',med_font,v7,'center',(160,180))
        blit_button('back',med_font,WHT,'midleft',(20,220)) # back button

    #display new objects
    pygame.display.flip()

GPIO.cleanup()
gpio.py
## nl392 jkb237
## final project
## gpio.py

###################################################################################################
## SYSTEM SETUP

import RPi.GPIO as GPIO
import shutil
import time
import os
import subprocess

# enable piTFT
#os.putenv('SDL_VIDEODRIVER','fbcon')
#os.putenv('SDL_FBDEV','/dev/fb1')
#os.putenv('SDL_MOUSEDRV','TSLIB')
#os.putenv('SDL_MOUSEDEV','/dev/input/touchscreen')

# some notes
# the BCM2837 clock speed is 1.2GHz, the shift registers max CLK speed at 5V is approx 25MHz

# shift register pin numbers
SHIFT_MASTER_RECLEAR_PIN = 14
SHIFT_OUTPUT_EN_PIN = 16
SHIFT_DATA_PIN = 20
SHIFT_LATCH_PIN = 12
SHIFT_CLK_PIN = 15

# MUX pin numbers
MUX_SEL_A_PIN = 13
MUX_SEL_B_PIN = 19
MUX_SEL_C_PIN = 26
MUX_DATA0_PIN = 4
MUX_DATA1_PIN = 17
MUX_DATA2_PIN = 22
MUX_DATA3_PIN = 5
MUX_DATA4_PIN = 6

# GPIO setup
GPIO.setmode(GPIO.BCM)
GPIO.setup(SHIFT_MASTER_RECLEAR_PIN, GPIO.OUT, initial = 1) # active low signal
GPIO.setup(SHIFT_OUTPUT_EN_PIN, GPIO.OUT, initial = 0) # active low signal
GPIO.setup(SHIFT_DATA_PIN, GPIO.OUT, initial = 0)
GPIO.setup(SHIFT_LATCH_PIN, GPIO.OUT, initial = 0)
GPIO.setup(SHIFT_CLK_PIN, GPIO.OUT, initial = 0)
# look into using PWM pins for control CLK
GPIO.setup(MUX_SEL_A_PIN, GPIO.OUT, initial = 0)
GPIO.setup(MUX_SEL_B_PIN, GPIO.OUT, initial = 0)
GPIO.setup(MUX_SEL_C_PIN, GPIO.OUT, initial = 0)
GPIO.setup(MUX_DATA0_PIN, GPIO.IN, pull_up_down=GPIO.PUD_DOWN)
GPIO.setup(MUX_DATA1_PIN, GPIO.IN, pull_up_down=GPIO.PUD_DOWN)
GPIO.setup(MUX_DATA2_PIN, GPIO.IN, pull_up_down=GPIO.PUD_DOWN)
GPIO.setup(MUX_DATA3_PIN, GPIO.IN, pull_up_down=GPIO.PUD_DOWN)
GPIO.setup(MUX_DATA4_PIN, GPIO.IN, pull_up_down=GPIO.PUD_DOWN)

# bailout
GPIO.setup(27, GPIO.IN, pull_up_down=GPIO.PUD_UP)
def GPIO27_callback(channel):
#    os.system('./quit')
    GPIO.output(SHIFT_OUTPUT_EN_PIN, 1)
    GPIO.output(SHIFT_MASTER_RECLEAR_PIN, 0)
    time.sleep(.5)
    GPIO.cleanup()
    quit()
GPIO.add_event_detect(27, GPIO.FALLING, callback=GPIO27_callback)

###################################################################################################
## INITIALIZE VARIABLES

# buttons, 1 for pressed, 0 for unpressed
# if pressed, corresponding LED toggles.

# LEDs
nLEDs = 40
led = []
for i in range(nLEDs):
    led.append(0)

# this doesn't need to be multidimensional, in fact it will make it easier for serial data to just
# have one stream

# flags
something_changed = False
periodic_refresh = False
timer = time.time()
debounce_timer = time.time()

###################################################################################################
## HELPER FUNCTIONS

def button_refresh():
#    print('button refresh started')
    global something_changed
    global debounce_timer

    debounce_time = 0.15

    for i in range (8):
        # set control signals
        if ((i & 0b001)==1): GPIO.output(MUX_SEL_A_PIN, 1)
        else: GPIO.output(MUX_SEL_A_PIN, 0)
        if ((i & 0b010)==2): GPIO.output(MUX_SEL_B_PIN, 1)
        else: GPIO.output(MUX_SEL_B_PIN, 0)
        if ((i & 0b100)==4): GPIO.output(MUX_SEL_C_PIN, 1)
        else: GPIO.output(MUX_SEL_C_PIN, 0)

        if time.time() - debounce_timer > debounce_time:
            # check data signals
            # mux1 -> btn 0-7
            if (GPIO.input(MUX_DATA0_PIN) == 1):
                print('button detected mux0')
                led[i] = 1 if led[i] == 0 else 0
                something_changed = True
            # mux2 -> btn 8-15
            if (GPIO.input(MUX_DATA1_PIN) == 1):
                print('button detected mux1')
                led[i + 8] = 1 if led[i + 8] == 0 else 0
                something_changed = True
            # mux3 -> btn 16-23
            if (GPIO.input(MUX_DATA2_PIN) == 1):
                print('button detected mux2')
                led[i + 16] = 1 if led[i + 16] == 0 else 0
                something_changed = True
            # mux4 -> btn 24-31
            if (GPIO.input(MUX_DATA3_PIN) == 1):
                print('button detected mux3')
                led[i + 24] = 1 if led[i + 24] == 0 else 0
                something_changed = True
            # mux5 -> btn 32-39
            if (GPIO.input(MUX_DATA4_PIN) == 1):
                print('button detected mux4')
                led[i + 32] = 1 if led[i + 32] == 0 else 0
                something_changed = True

            if something_changed == True:
                debounce_timer = time.time()

def shift_out():
#    print('shift out started')
    # clear everything before we're about to start shifting
#    print(led)
    GPIO.output(SHIFT_LATCH_PIN, 0)
    GPIO.output(SHIFT_DATA_PIN, 0)

    # set clock to low, so the next transition is a rise
    GPIO.output(SHIFT_CLK_PIN, 0)

    for i in range(nLEDs):

        # set data to write
        GPIO.output(SHIFT_DATA_PIN, led[nLEDs-1-i])

        # on rising clock edge, data shifts one position
        GPIO.output(SHIFT_CLK_PIN, 1)

        # rpi clock is too fast, so delay to decrease frequency
        time.sleep(0.001)

        # reset clock
        GPIO.output(SHIFT_CLK_PIN, 0)


def display_leds():
#    print('display leds started')
    # setting this pin high attaches the output to the register's internal storage
    GPIO.output(SHIFT_LATCH_PIN, 1)

def save_board():
    print(led)
#    print('board save started')
    # open current_board.txt
    with open('current_board.txt','r') as current_board: # open current_board.txt
        file_lines = current_board.readlines() # this is a list. elements are lines of the file
        print(file_lines)
        while not file_lines: # if file lines is empty due to file change etc
            time.sleep(.050) # wait for 50 msec
            file_lines = current_board.readlines() # and check again
        diff = file_lines[5] # grab the difficulty label
        v = file_lines[6] # grab the difficulty index

    with open('current_board.txt','w') as current_board:  # reopen current_board.txt as a blank file
        for i in range(nLEDs):
            if (i != 0 and i % 8 == 0): current_board.write('\n') # write every 8 LEDs on a new line
            current_board.write(str(led[i]))
        current_board.write('\n') # last new line before dumping difficulty
        current_board.write(diff) # reappend difficulty label
        current_board.write(v) # reappend difficulty index

def read_board():
#    print('read board started')
    index = 0 # led list iterator
    with open('current_board.txt','r') as current_board: # open current_board.txt
        file_lines = current_board.readlines() # this is a list. elements are lines of the file
        while not file_lines: # if file lines is empty due to file change etc
            time.sleep(.05) # wait for 50 msec
            file_lines = current_board.readlines() # and check again
#        print(file_lines)
        for line in range(5): # iterate over each line with led data. each line represents a column
#            print('line')
            digits = file_lines[line].strip('\n') # remove new line character from each line
#            print(digits)
            for char in range(8): # for each digit in the line
#                print(index)
#                print(digits[char])
#                print(digits[char])
                led[index] = int(digits[char]) # save the digit in the corresponding led list spot
                index = index + 1 # increment iterator so next digit is saved in the correct led list spot
#        print(led)

###################################################################################################
## MAIN LOOP

while True:
    time.sleep(.1)
    if (time.time() - timer > 0.2):
        periodic_refresh = True

    button_refresh();
    if (something_changed):
#        print('change status: '+str(something_changed))
        save_board()
        shift_out()
        display_leds()
        something_changed = False

    elif (periodic_refresh):
#        print('change status: '+str(something_changed))
        read_board()
        shift_out()
        display_leds()
        periodic_refresh = False
        timer = time.time()

    else: pass

GPIO.cleanup()